Quantcast
Channel: Selenium – Vinsguru
Viewing all 69 articles
Browse latest View live

Selenium WebDriver – How To Handle Annoying Random Popup / Alerts

$
0
0

Overview:

In this article, Lets see how we could handle random popups / alerts / ads / some unexpected conditions & how we could recover from that.

Problem Statement:

I had an application which used to show popups / ads, as shown below, at random. As per the requirement it can be shown anytime (there was some complex business rules behind that. but lets ignore that for the time being). The user had to either click on the close button or take some action on the popup before continuing. It would make our selenium tests fail as this popup will steal the focus. It would be annoying for us – but it was generating some revenue for our organization!!

ele-proxy-002

While automating this application, We wanted to have our selenium scripts to be something like this…

doSomethingA();
doSomethingB();
doSomethingC();

But our selenium scripts used to be something like this.

public void checkForPopupAndKill(){
    if(popup.isDisplayed()){
        popup.close();
    }
}

checkForPopupAndKill();
doSomethingA();
checkForPopupAndKill();
doSomethingB();
checkForPopupAndKill();
doSomethingC();

The team had to include checkForPopupAndKill before each and every statement to handle the popup. As you see,the script looked horrible!!  This is because the source/client (here it is our selenium scripts) is directly interacting with the target object (actual application). As the popup can be shown anytime in the application, it would steal the focus when it appears. So , say, any click even on the main application can not be done as it would throw an exception that ‘Other element would receive the click’. So, we could not escape from adding checkForPopupAndKill  for every statement as per this approach.

ele-proxy-003


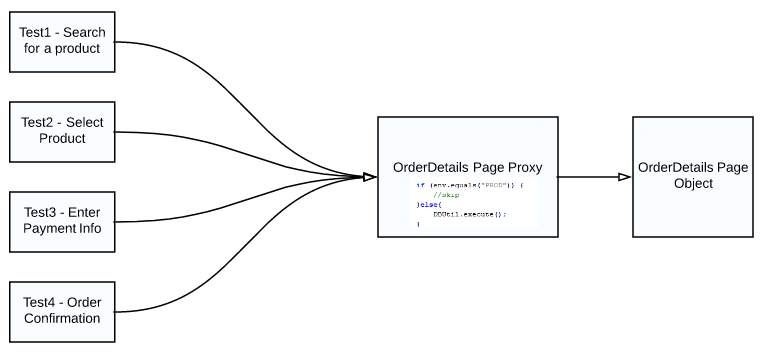
I was looking for something like an intermediary object between the source and target and let the intermediary object handle this popup. So that your selenium scripts do not have to worry about killing the popup.

ele-proxy-004

If we could use an intermediary  object – we could write statements as we wanted to have as shown below. All these statement do not get executed directly on the target object. Instead the intermediary object decides what to do!

doSomethingA();
doSomethingB();
doSomethingC();

Java Dynamic Proxy:

Java supports the creation of dynamic proxy classes and instances. Proxy objects are useful in many situations to act as an intermediary between a client object and a target object. We could create a proxy object by implementing InvocationHandler interface.

Lets create an ElementProxy class which implements this interface. Basically, the proxy’s invoke method would be called first before the actual method is invoked. As our idea was to call checkForPopupAndKill before invoking any action on a WebElement, this could be the right place to include the checkForPopupAndKill method.

public class ElementProxy implements InvocationHandler {

    private final WebElement element;

    public ElementProxy(WebElement element) {
        this.element = element;
    }

    @Override
    public Object invoke(Object proxy, Method method, Object[] args) throws Throwable {
        //before invoking actual method check for the popup
        this.checkForPopupAndKill();
        //at this point, popup would have been closed if it had appeared. element action can be called safely now.
        Object result = method.invoke(element, args);
        return result;
    }

    private void checkForPopupAndKill() {
        if (popup.isDisplayed()) {
            System.out.println("You damn popup, you appearded again!!?? I am gonna kill you now!!");
            popup.close();
        }
    }
    
}

We need to wrap our regular WebElement with this proxy object. We basically need a class which has a method to accept a WebElement and returns the WebElement with some wrapper.

public class ElementGuard {

    public static WebElement guard(WebElement element) {
        ElementProxy proxy = new ElementProxy(element);
        WebElement wrappdElement = (WebElement) Proxy.newProxyInstance(ElementProxy.class.getClassLoader(),
                                                                       new Class[] { WebElement.class },
                                                                       proxy);
        return wrappdElement;
    }

}

When we call the below statement, it creates wrapper around element and returns the element.

ElementGuard.guard(element)

ele-proxy-005

If we try to call the click method of the WebElement, it would always call the ‘invoke’ method first, then it would call the ‘click’

ele-proxy-006


I create the below class to init elements of the page object with wrapper elements.

public class MyPageFactory {
    
    public static <T> void initElements(WebDriver driver, T pageobject){
        
        //first init elements
        PageFactory.initElements(driver, pageobject);
        
        //then access all the WebElements and create a wrapper
        for(Field f:pageobject.getClass().getDeclaredFields()){
            if(f.getType().equals(WebElement.class)){
                boolean accessible = f.isAccessible();
                f.setAccessible(true);
                //reset the webelement with proxy object
                f.set(pageobject, ElementGuard.guard((WebElement) f.get(pageobject)));
                f.setAccessible(accessible);
            }  
        }

    }
    
}

My sample page would be something like this – without much change.

public class RegistrationPage {

    private final WebDriver driver;

    @FindBy(name = "firstName")
    private WebElement firstName;

    @FindBy(name = "lastName")
    private WebElement lastName;

    @FindBy(name = "email")
    private WebElement userName;

    @FindBy(name = "password")
    private WebElement password;

    @FindBy(name = "confirmPassword")
    private WebElement confirmPassword;

    @FindBy(name = "register")
    private WebElement submit;

    public RegistrationPage(WebDriver driver) throws Exception {
        this.driver = driver;
        MyPageFactory.initElements(driver, this);
    }

    public RegistrationPage launch() {
        driver.get("http://newtours.demoaut.com/mercuryregister.php");
        return this;
    }

    public RegistrationPage setFirstName(String firstName) {
        this.firstName.sendKeys(firstName);
        return this;
    }

    public RegistrationPage setLastName(String lastName) {
        this.lastName.sendKeys(lastName);
        return this;
    }

    public RegistrationPage setUserName(String userName) {
        this.userName.sendKeys(userName);
        return this;
    }

    public RegistrationPage setPassword(String password) {
        this.password.sendKeys(password);
        return this;
    }

    public RegistrationPage setConfirmPassword(String confirmPassword) {
        this.confirmPassword.sendKeys(confirmPassword);
        return this;
    }

    public void submit() {
        this.submit.click();
    }

}

My tests would be something like this.

RegistrationPage r = new RegistrationPage(driver);

r.launch()
 .setFirstName("fn")
 .setLastName("ln")
 .setUserName("un")
 .setPassword("password")
 .setConfirmPassword("password");

When I execute the tests, all the popup checks happens behind the scenes.

going to call :sendKeys with args : fn
going to call :sendKeys with args : ln
You damn popup, you appearded again!!?? I am gonna kill you now!!
going to call :sendKeys with args : un
going to call :sendKeys with args : password

Summary:

By using Dynamic Proxy object,  all the unexpected events like this can he handled behind the scenes. Our page object and tests look exactly the same. But any action goes via the proxy object. I do not have to repeat the checkForPopupAndKill method every time. proxy object takes care of it!  Not only this popup or alert, any logging, reporting etc can be handled like this.


Happy Testing & Subscribe 🙂


Share This:


Selenium WebDriver – Design Patterns in Test Automation – Proxy Pattern

$
0
0

Overview:

As a software engineer, We all face some errors/exceptions while writing code! So what do we do when we face such a problem? If we are not sure, We google for solutions immediately. Don’t we? We google because we know that we would not be alone and someone would have already found the solution, for the problem we are facing now, which we could use to solve our problem.

Well, What to do if we face an issue in the high level software design – when connecting different classes / modules – when you have only a vague idea!! How can we google such things when we ourselves are not sure of the problem we have in the first place!!

No worries, You still have a solution!

Design patterns are the solutions for the problems which you might face in the software design!!

Design Patterns are well optimized and reusable solutions to a given problem in the software design. It helps us to show the relationship among the classes and the way in which they interact. Design pattern is a template which you have to carefully analyze and use it in appropriate places.

More information on design pattern can be found here.

Design Patterns in Test Automation:

As an automated test engineer, should we really care about design principles and patterns? Why do we need to learn/use Design Patterns in functional test automation?

After all, Test automation framework/automated test case is also a software which is used to test another software. So, we could apply the same design principles/patterns in our test automation design as well to come up with more elegant solution for any given design related problem in the test automation framework.

Remember that Design Patterns are NOT really mandatory. So you do not have to use them! But when you learn them, you would know exactly when to use! Basically these are all well tested solutions. So when you come across a problem while designing your framework/automated test cases, these design patterns could immediately help you by proving you a formula / template & saves us a lot of time and effort.

Note: Your aim should not be to implement a certain pattern in your framework. Instead, identify a problem in the framework and then recognize the pattern which could be used to solve the problem. Do not use any design pattern where it is not really required!!

In this article, We are going to see where we could use the Proxy Pattern which is one of the Structural design patterns.

Problem Statement:

I am going to consider the same problem mentioned in this article here. But We will try to implement the solution differently using design patterns.

Problem is – I run thousands of automated tests on a daily basis as part of our nightly regression. There are few cases which require DB access to execute certain SQL statements as part of data setup and cleanup activity. In the lower environments like Dev & QA , the script will work perfectly fine where we access to DB. We have a frequent PROD push – so we also our run automated regression on PROD after the release to ensure that PROD is working as expected. As we do not have PROD DB access, the script will throw exception as it would try to connect to a database. The team started writing a lot of it-else conditions everywhere in the test before executing DB statements to ensure that the SQL statements related steps are ignored in the test for PROD environment.

proxy-prob-statement

If-else conditions affect the readability of the tests. Secondly, If we need to add one more environment like Staging where we do not have DB access, then you need to update all the tests.

Proxy Pattern:

Proxy design pattern allows us to create a wrapper/proxy class over a real object. Then this proxy class is used to provide controlled access to the real object. It is a very simple solution to restrict access!  More info on the below UML diagram is here.

proxy-design-pattern-implementation-uml-class-diagram

Lets see how we could use Proxy design pattern to solve our problem here. Lets first create an Interface with all the possible methods required for the DB data setup.

public interface DBUtil {
    
    void insertUser();
    void deleteUser();

}

I have an Enum for TestEnvironment.

public enum TestEnvironment{
    
    DEV,
    QA,
    STAGING,
    PROD
    
}

Lets create a real class which implements this interface! This class is responsible for connecting to the DB and executing the db statements.

class DBUtilImpl implements DBUtil {

    DBConnection dbConnection;

    public DBUtilImpl(TestEnvironment environment){
        //DB connection
    }

    @Override
    public void insertUser() {
        System.out.println("inserting new user");
    }

    @Override
    public void deleteUser() {
        System.out.println("deleting user");
    }
    
}

Now Lets create a proxy class which implements the same interface!  This class contains a list of all the test environments which do not support DB execution.

public class DBUtilProxy implements DBUtil {

    private DBUtil dbUtil;
    private static final List<TestEnvironment> restrictEnvironmentList;

    //restrict DB access for the below environments
    static{
        restrictEnvironmentList = new ArrayList<>();
        restrictEnvironmentList.add(TestEnvironment.PROD);
        restrictEnvironmentList.add(TestEnvironment.STAGING);
    }

    public DBUtilProxy(TestEnvironment testEnvironment){
        if(!restrictEnvironmentList.contains(testEnvironment)){
            dbUtil = new DBUtilImpl(testEnvironment);
        }
    }

    @Override
    public void insertUser() {
        if(Objects.nonNull(dbUtil)){
            dbUtil.insertUser();
        }
    }

    @Override
    public void deleteUser() {
        if(Objects.nonNull(dbUtil)){
            dbUtil.deleteUser();
        }
    }

}

My testNG/JUnit test class will look something like this. We always use the DBUtilProxy class to create an instance of DBUtil. We pass the test environment for which we need to make a DB connection. Proxy class decides whether to create DBUtilImpl object or not – depends on the environment. So, if any of the test environment does not support DB execution, then it is simply skipped.

public class Test1 {
    
    DBUtil dbUtil;
    
    @BeforeTest
    @Parameters
    public void dataSetup(String testEnvironment){
        dbUtil = new DBUtilProxy(TestEnvironment.valueOf(testEnvironment));
        dbUtil.insertUser();
    }

    @Test
    public void test1(){
        //login as the user
    }

    @Test
    public void test2(){
        //place order
    }
    
}

The implementation would look as shown in the below diagram.

proxy-impl

Note:

  • DB cleanup and setup are required for the lower environments where we run the automated tests very often.
  • For PROD, the test runs only once after the PROD Push – where user’s desired state is setup in other ways. So, the test runs just fine.

Summary:

By using Proxy design pattern we could restrict access to an object as we saw above. It avoids if-else conditions everywhere in your script. We could use this pattern even during our page object design as well if you have any such functionality.

For ex: Consider this flow.

  1. User searches for a product from a e-comm site
  2. Selects a product to order
  3. Enter payment info [Usually fake CC for test environments / Not for production]
  4. Order Confirmation page

proxy-impl-use-case

We test the above workflow thoroughly in the lower environments using a fake CC. But for production, fake CC might not work. Nobody will want to use their CC as test CC for PROD. So we might want to skip those steps from the execution. We could use Proxy page for to skip those pages where we do not need to test in PROD.


Happy Testing & Subscribe 🙂


Share This:

Selenium WebDriver – Design Patterns in Test Automation – Decorator Design Pattern

$
0
0

Overview:

As a software engineer, We all face some errors/exceptions while writing code! So what do we do when we face such a problem? If we are not sure, We google for solutions immediately. Don’t we? We google because we know that we would not be alone and someone would have already found the solution, for the problem we are facing now, which we could use to solve our problem.

Well, What to do if we face an issue in the high level software design – when connecting different classes / modules – when you have only a vague idea!! How can we google such things when we ourselves are not sure of the problem we have in the first place!!

No worries, You still have a solution!

Design patterns are the solutions for the problems which you might face in the software design!!

Design Patterns are well optimized and reusable solutions to a given problem in the software design. It helps us to show the relationship among the classes and the way in which they interact. Design pattern is a template which you have to carefully analyze and use it in appropriate places.

More information on design pattern can be found here.

Design Patterns in Test Automation:

As an automated test engineer, should we really care about design principles and patterns? Why do we need to learn/use Design Patterns in functional test automation?

After all, Test automation framework/automated test case is also a software which is used to test another software. So, we could apply the same design principles/patterns in our test automation design as well to come up with more elegant solution for any given design related problem in the test automation framework.

Remember that Design Patterns are NOT really mandatory. So you do not have to use them! But when you learn them, you would know exactly when to use! Basically these are all well tested solutions. So when you come across a problem while designing your framework/automated test cases, these design patterns could immediately help you by proving you a formula / template & saves us a lot of time and effort.

Note: Your aim should not be to implement a certain pattern in your framework. Instead, identify a problem in the framework and then recognize the pattern which could be used to solve the problem. Do not use any design pattern where it is not really required!!

In this article, We are going to see where we could use the Decorator Pattern which is one of the Structural design patterns.

Problem Statement:

I have a manage console / support application in which depends on the role of the logged in user,  we show different components on the screen.

For ex:  The ‘user’ role can only manage order specific functionalities – like create, edit, cancel orders.

prob-1

‘super user’ role can manage ‘user’, ‘orders’ & also can generate ‘reports’.

prob-2

‘admin’ role user will have ‘business unit’ management in addition to the ‘super user’ features.

prob-3

So, We have a base user page. Then we add few components in the UI depends on the role. This is what exactly the decorator pattern is.

To understand this better, consider the below example in which we have a base weapon. Then you add few accessories (decorate base weapon with required accessories) to create a new weapon. [More info is here]

decorator-oo-design

Decorator Pattern:

Decorator pattern allows us to add additional responsibilities to an object dynamically. Our ManageConsole page follows the same pattern. Basically I have a base user page, then we add few components.

prob-base-design

Lets see how we could use this decorator pattern to solve our test design.

Admin Site Page Object:

Lets create a page object for Admin site considering all the possible features. [I have followed Advanced Page Object design to create the page. That is, all the components of the page are considered as separate fragments. By combining these fragments, we create the ManageConsole page. If you have not read about that page object design before, I would suggest you to read that first].

public class ManageConsolePage {

    @FindBy(id="bumgmt")
    private BUManagement buManagement;

    @FindBy(id="ordermgmt")
    private OrderManagement orderManagement;

    @FindBy(id="usermgmt")
    private UsersManagement usersManagement;

    @FindBy(id="reports")
    private Reports reports;

    public BUManagement getBuManagement() {
        return buManagement;
    }

    public OrderManagement getOrderManagement() {
        return orderManagement;
    }

    ...
}

Each fragment in the class has a isPresent method to check if the component is displayed in UI or not.

Decorator Pattern Design:

As part of my test, I need to ensure that based on the logged in user role if the corresponding components are displayed in UI.  So, I have a base ‘Order Validation’. Then I have few additional rules like user management screen presence check and an absence check etc.

prob-test-design

In my other Design Patterns articles, I used different classes to explain the pattern . But this time, instead of creating multiple classes, I am going to make use of Java8 Consumer Functional Interface. Consumer interface allows us to chain another Consumer interface – This is like adding additional feature to an existing object.

For ex: Consider this example

Consumer<String> toLower = (s) -> {
    System.out.println(s.toLowerCase());
};

Consumer<String> toUpper = (s) -> {
    System.out.println(s.toUpperCase());
};

toLower.andThen(toUpper).accept("Test");

The above code prints the following. We chained different behaviors to execute one after another.

test
TEST

I am creating a Decorator class which consists of many Consumers – they are like accessories to decorate our page object.

public class ManageConsoleTestDecorators {

    //base validation
    public static Consumer<ManageConsolePage> orderValidation = (page) -> {
        Assert.assertTrue(page.getOrderManagement().isDisplayed());

        page.getOrderManagement().createNewOrder();
        Assert.assertTrue(page.getOrderManagement().isOrderSucccessful());
    };

    //user component presence check
    public static Consumer<ManageConsolePage> userValidation = (page) -> {
        Assert.assertTrue(page.getUserManagement().isDisplayed());
    };

    //user component absence check
    public static Consumer<ManageConsolePage> userAbsenceValidation = (page) -> {
        Assert.assertFalse(page.getUserManagement().isDisplayed());
    };

    //report component presence check
    public static Consumer<ManageConsolePage> reportValidation = (page) -> {
        Assert.assertTrue(page.getReport().isDisplayed());
    };

    //report component absence check
    public static Consumer<ManageConsolePage> reportAbsenceValidation = (page) -> {
        Assert.assertFalse(page.getReport().isDisplayed());
    };

    //bu component presence check
    public static Consumer<ManageConsolePage> buValidation = (page) -> {
        Assert.assertTrue(page.getBuManagement().isDisplayed());
    };

    //bu component absence check
    public static Consumer<ManageConsolePage> buAbsenceValidation = (page) -> {
        Assert.assertFalse(page.getBuManagement().isDisplayed());
    };

}

Test Design:

Now in my test, I can create 3 different page objects – 1 for each role with specific component validations by using above decorators as shown below.

public class ManageConsoleTest {
    
    //user role page should have report, order, bu absence validations
    private Consumer<ManageConsolePage> userRolePage = orderValidation.andThen(reportAbsenceValidation)
                                                                      .andThen(userAbsenceValidation)
                                                                      .andThen(buAbsenceValidation);

    //super user role page should have report, order presence validation & bu absence validations
    private Consumer<ManageConsolePage> superUserRolePage = orderValidation.andThen(userValidation)
                                                                            .andThen(reportValidation)
                                                                            .andThen(buAbsenceValidation);

    //admin user should all components presence validation
    private Consumer<ManageConsolePage> adminRolePage = orderValidation.andThen(userValidation)
                                                                        .andThen(reportValidation)
                                                                        .andThen(buValidation);

    @Test(dataProvider = "getData")
    public void manageConsoleSiteTest(String username, String password, Consumer<ManageConsolePage> decoratedPageValidation){
        ManageConsolePage page = new ManageConsolePage(DriverManager.getDriver());
        page.signin(username, password);
        decoratedPageValidation.accept(page);
        page.signout();
    }

    @DataProvider
    public Object[][] getData(){
        return new Object[][]{
                {"user1", "password", userRolePage} ,
                {"superuser1", "password", superUserRolePage} ,
                {"admin1", "password", adminRolePage} ,
        };
    }

}

Summary:

By using decorator pattern, we create page objects with dynamic components. In future, if the application adds another component or another role type, it is extremely easy to update the test. By using a single test class, we test all the possible roles and components of the page. Without decorator pattern, we would end up having the traditional if-else approach with additional branching for the component & role type validation.  It would have increased the complexity of the maintenance of the test design. Without a single conditional check, Decorator pattern improves the readability & maintainability of the tests.

Please check other design patterns articles here.

Happy Testing & Subscribe 🙂


Share This:

Selenium WebDriver – File Downloads & Uploads Using Docker Grids

$
0
0

Overview:

TestAutomationGuru has released few articles on using docker for Selenium Grids & to run your automated inside the docker containers. This approach has a lot of advantages like saving your time from setting up your remote/cloud machines & dealing with dependency related issues. It is easily scalable as well!

If you have not read below articles on docker before, I would suggest you to take a lot them first – so that you could understand this article better.

In this article, Lets see how we could handle file upload, downloads, accessing the file system while using dockerized selenium tests.

Sample Application:

To explain things better, I am going to use this automation practice site – http://the-internet.herokuapp.com for playing with file upload, download.

File Upload:

File upload is relatively very simple when you use dockerized grid . You need to ensure that you set the file detector as shown here. Running the test as usual will upload the file in the remote/docker grid browser.

((RemoteWebDriver) driver).setFileDetector(new LocalFileDetector());

Sample Page Object:

public class HerokuAppUploadPage {

    private final WebDriver driver;
    private final WebDriverWait wait;

    @FindBy(id="file-upload")
    private WebElement fileUpload;

    @FindBy(id="file-submit")
    private WebElement uploadBtn;

    @FindBy(id="uploaded-files")
    private WebElement uploadedFileName;

    public HerokuAppUploadPage(final WebDriver driver) {
        this.driver = driver;
        PageFactory.initElements(driver, this);
        this.wait = new WebDriverWait(driver, 30);
    }

    public void goTo() {
        this.driver.get("http://the-internet.herokuapp.com/upload");
    }

    public void uploadFile(String path){
        if(driver instanceof RemoteWebDriver){
            ((RemoteWebDriver) driver).setFileDetector(new LocalFileDetector());
        }
        this.fileUpload.sendKeys(path);
        this.uploadBtn.click();
        wait.until(ExpectedConditions.visibilityOfElementLocated(By.id("uploaded-files")));
    }

    //once the upload is success, get the name of the file uploaded
    public String getUploadedFileName(){
        return this.uploadedFileName.getText().trim();
    }
}

Sample Test:

public class UploadFileTest extends BaseTest {

    private HerokuAppUploadPage herokuAppPage;

    @BeforeTest
    public void setUp() throws MalformedURLException {
        super.setUp();
        herokuAppPage = new HerokuAppUploadPage(driver);
    }

    @Test
    public void uploadTest() throws InterruptedException {
        herokuAppPage.goTo();
        herokuAppPage.uploadFile("/home/qa/Downloads/sample.xlsx");
        Assert.assertEquals("sample.xlsx", herokuAppPage.getUploadedFileName());
    }

}

File Download:

Lets look at an easy example first. In the below, case, we could simply get the href attribute value to build the URL of the static file which we need to download.

<a href="download/sample.xlsx">sample.xlsx</a>

Even if you use remote webdriver for a docker grid, you could still get the attribute value and using the link, you could download the file easily by running some commands as shown here.

wget http://the-internet.herokuapp.com/download/sample.xlsx

Not all the file downloads might be very easy as the above one. In my application, there is no href attribute for a file download link! The file is getting generated at run time, gets downloaded immediately.  In this case, It might be a challenge to assert if the file is downloaded successfully if you are using docker grid.

When you download a file using dockerized selenium grid, It downloads and keeps the downloaded file inside the container. The outside world which is your machine/any remote machine running docker will not have any information on it.

doc-vol-mapping-02

In this picture, Java testng/junit tests running on your host, use the dockerized selenium grid. It can control the browser inside the container via RemoteWebDriver object. But, there is no way to access container directory. In this case, How can we assert that file has been downloaded?

Volume Mapping:

Docker has a concept of ‘volume mapping‘ which is basically used to map a directory of the host machine to a directory inside the container. By volume mapping, the file gets downloaded inside the container’s directory will be available in your host directory as well.

doc-vol-mapping-03

To map a directory, we use below options when you start your docker container.

-v host-absolute-directory-path:container-abolute-directory-path

When you have your docker selenium grid, the files are getting downloaded at /home/seluser/Downloads inside the container. So you could map them to a directory somewhere in your host machine.

You start your hub as shown here.

sudo docker run -d -p 4444:4444 --name selenium-hub selenium/hub

When you start your chrome/firefox nodes, do the volume mapping as shown here.

sudo docker run -d --link selenium-hub:hub -v /home/vins/Downloads:/home/seluser/Downloads selenium/node-chrome
sudo docker run -d --link selenium-hub:hub -v /home/vins/Downloads:/home/seluser/Downloads selenium/node-firefox

I mapped my host machine download directory (it can be any directory in your host with enough permission) to a docker container’s download directory.

Let’s see how it works.

Sample Page Object:

public class HerokuAppDownloadPage {
    
    private final WebDriver driver;

    @FindBy(linkText="some-file.txt")
    private WebElement downloadFile;

    public HerokuAppDownloadPage(final WebDriver driver) {
        this.driver = driver;
        PageFactory.initElements(driver, this);
    }

    public void goTo() {
        this.driver.get("http://the-internet.herokuapp.com/download");
    }

    public void downloadFile(){
        //this will download file into the /home/seluser/Downloads directory
        this.downloadFile.click();
    }

}

When I run above code, I could see the downloaded file in my host directory.

ls -al
-rw-r--r--  1 vins vins         0 Mar  3 11:25 some-file.txt

Sample Test:

@Test
public void downloadTest() {
    downloadPage.goTo();
    downloadPage.downloadFile();

    Path path = Paths.get("/home/vins/Downloads/some-file.txt");

    //this will wait until the file download is complete.
    Awaitility.await()
        .atMost(1, TimeUnit.MINUTES)
        .until(() -> {
            return path.toFile().exists();
        });


    Assert.assertTrue(path.toFile().exists());
}

Now, when I use docker selenium grid with volume mapping, the downloaded file is present in my host machine in the specific directory which I mapped. [In case of any large file download, the dowload process might take a while. I would suggest you to take a look at the awaitility library as shown above to wait for actions to complete . Check this article on that.]

This is great, so far!  But, What about your tests itself runs inside a container as shown in the articles below.!? How can 2 containers share the file system?

Volume Mapping Between Containers:

Docker volume mapping will help here as well. In this case, we do the mapping twice. One for your browser node – to get the file in the host directory as we saw above and another mapping for your test container. This is to map the host directory which has the file to your container directory. So that your tests inside the container could see the file.


doc-vol-mapping-05

Lets assume that I have created a docker image with my tests included. If you are not sure how, You need to check these articles first!

I assume that there is a directory – /usr/share/tag/Downloads in my container. I also assume that all the downloaded files would be present there somehow like magic!!. So, in that case, I should modify my tests as shown here.

@Test
public void downloadTest() {
    downloadPage.goTo();
    downloadPage.downloadFile();

    Path path = Paths.get("/user/share/tag/Downloads/some-file.txt");

    //this will wait until the file download is complete.
    Awaitility.await()
        .atMost(1, TimeUnit.MINUTES)
        .until(() -> {
            return path.toFile().exists();
        });


    Assert.assertTrue(path.toFile().exists());
}

Now when I run my tests inside the container, I do the volume mapping. /home/vins/Downloads is the host directory which is expected to have all the downloaded files. Now we map that to a container which has my above test which is expecting the files to be in /usr/share/tag/Downloads.

sudo docker run -v /home/vins/Downloads:/usr/share/tag/Downloads vinsdocker/containertest:downloadtest

Now the rest is simple. Running the above command will start a container and run the test inside the container – this will trigger the execution in another docker grid. Since we map same host folder to both of these containers, the containers can share the files via the mapped folder.

Docker Compose:

As you might already know, we do not need to do the mapping every time through command line. Instead, we could define that in the docker-compose file.  Create a docker-compose.yml file as shown here with appropriate volume mappings for your grid and test containers.

version: "3"
services:
  selenium-hub:
    image: selenium/hub
    container_name: selenium-hub
    ports:
      - "4444:4444"
  chrome:
    image: selenium/node-chrome
    depends_on:
      - selenium-hub
    environment:
      - HUB_PORT_4444_TCP_ADDR=selenium-hub
      - HUB_PORT_4444_TCP_PORT=4444
    volumes:
      - /home/qa/Downloads:/home/seluser/Downloads
  firefox:
    image: selenium/node-firefox
    depends_on:
      - selenium-hub
    environment:
      - HUB_PORT_4444_TCP_ADDR=selenium-hub
      - HUB_PORT_4444_TCP_PORT=4444
    volumes:
      - /home/qa/Downloads:/home/seluser/Downloads
  containertest:
    image: vinsdocker/containertest:demo
    depends_on:
      - chrome
      - firefox
    environment:
      - MODULE=upload-module.xml
      - BROWSER=firefox
      - SELENIUM_HUB=selenium-hub     
    volumes:
      - /home/qa/Downloads:/usr/share/tag/Downloads

Now issuing a single command does all these things for you within a fraction of second!

  • Creating selenium hub
  • Chrome node & maps the directories
  • Firefox node & maps the directories
  • Test container & maps the directories
  • Triggers the test

Summary:

Docker saves a huge amount of effort related to infrastructure set ups to run the test automation. We define everything in a single file. By feeding this to docker-compose, you create the entire setup with all the dependencies, directories etc in a single command and gets your tests executed.

Happy Testing & Subscribe 🙂


Share This:

Selenium WebDriver – Design Patterns in Test Automation – Chain Of Responsibility Design Pattern

$
0
0

Overview:

As a software engineer, We all face some errors/exceptions while writing code! So what do we do when we face such a problem? If we are not sure, We google for solutions immediately. Don’t we? We google because we know that we would not be alone and someone would have already found the solution, for the problem we are facing now, which we could use to solve our problem.

Well, What to do if we face an issue in the high level software design – when connecting different classes / modules – when you have only a vague idea!! How can we google such things when we ourselves are not sure of the problem we have in the first place!!

No worries, You still have a solution!

Design patterns are the solutions for the problems which you might face in the software design!!

Design Patterns are well optimized and reusable solutions to a given problem in the software design. It helps us to show the relationship among the classes and the way in which they interact. Design pattern is a template which you have to carefully analyze and use it in appropriate places.

More information on design pattern can be found here.

Design Patterns in Test Automation:

As an automated test engineer, should we really care about design principles and patterns? Why do we need to learn/use Design Patterns in functional test automation?

After all, Test automation framework/automated test case is also a software which is used to test another software. So, we could apply the same design principles/patterns in our test automation design as well to come up with more elegant solution for any given design related problem in the test automation framework.

Remember that Design Patterns are NOT really mandatory. So you do not have to use them! But when you learn them, you would know exactly when to use! Basically these are all well tested solutions. So when you come across a problem while designing your framework/automated test cases, these design patterns could immediately help you by proving you a formula / template & saves us a lot of time and effort.

Note: Your aim should not be to implement a certain pattern in your framework. Instead, identify a problem in the framework and then recognize the pattern which could be used to solve the problem. Do not use any design pattern where it is not really required!!

In this article, We are going to see where we could use the Chain Of Responsibility Pattern which is one of the Behavioral design patterns.

Problem Statement:

I had an application to automate in which we had many business logic to show the next screen. We kept introducing new screens, modifying existing ones or removing screens. It was very challenging to automate the application. I needed to find a solution to minimize the overall maintenance effort. Chain Of Responsibility helped me to achieve what we wanted!

Lets consider a sample application in which the business workflow is as shown here.

prob-statemnt-cor-2


  • In order to purchase a product from the site, the user should have been registered.
  • The site offers has some free/trial products. When the price is $0, the payment info page is simply skipped, the site just shows the order confirmation page.
  • Existing user can view his existing order / create new order after logging into the site.

Above workflow might look simple. But there are few conditions based on that we display appropriate pages. If the business wants to introduce new screens/conditions in the workflow, then it will add more complexity in the test design. To test the application behavior, we need to consider all the possible combinations of the workflow, prepare tests & test data accordingly.

Lets see how we could handle this complexity using Chain Of Responsibility pattern.

Chain Of Responsibility Pattern:

Chain of Responsibility pattern helps to avoid coupling the sender of the request to the receiver by giving more than object to handle the request. More info is here. To understand this better, Lets consider the ATM machine example.

prob-statemnt-cor-atm

  • If I need to withdraw $180, I could expect 1 $100, 1 $50, 1 $20 and 2 $5 from the ATM machine.  If $100 is not available, Then I could expect 2 $50 instead.

Handling this logic ourselves in the code is very difficult to maintain.

Traditional Approach:

if(amount > 100){
    System.out.println("Dispatching $" + 100 + " x " + amount / 100);
    amount = amount % 100;
}

if(amount > 50){
    System.out.println("Dispatching $" + 50 + " x " + amount / 50);
    amount = amount % 100;
}

if(amount > 20){
    System.out.println("Dispatching $" + 20 + " x " + amount / 20);
    amount = amount % 20;
}

...

Instead of the above approach, we create all the possible handlers like 100_handler, 50_handler etc… then we chain these handlers to together as one single handler.

Lets see how we could create this ATM example in Java using Java8 Functional Interfaces.

static Function<Integer, Integer> getHandler(int handler) {
    return (amount) -> {
        if (amount >= handler) {
            System.out.println("Dispatching $" + handler + " x " + amount / handler);
        }
        return amount % handler;
    };
}
Function<Integer, Integer> handler100 = getHandler(100);
Function<Integer, Integer> handler50 = getHandler(50);
Function<Integer, Integer> handler20 = getHandler(20);
Function<Integer, Integer> handler10 = getHandler(10);
Function<Integer, Integer> handler5 = getHandler(5);
Function<Integer, Integer> handler1 = getHandler(1);

//now we chain these handlers together as 1 single handler
Function<Integer, Integer> ATM = handler100.andThen(handler50)
                                            .andThen(handler20)
                                            .andThen(handler10)
                                            .andThen(handler5)
                                            .andThen(handler1);

ATM.apply(183);

Running the above code displays the following as expected.

Dispatching $100 x 1
Dispatching $50 x 1
Dispatching $20 x 1
Dispatching $10 x 1
Dispatching $1 x 3

Now If the government tries to introduce new denomination, say $500 and $30, it is easy to include them in the chain. The caller does not need to worry about the new denomination.

Lets see how we could apply similar pattern for our workflow.

Page Object Design:

We already have enough articles on Page Objects Design in TestAutomationGuru. I have followed Advanced Page Object design to create the page. That is, all the components of the page are considered as separate fragments. If you have not read about that page object design before, I would suggest you to read that first.

Lets assume that we have page objects for the above pages in the workflow. Aim of this article is to design the test using Chain Of Responsibility pattern.

Test Data Design:

Lets assume we have test data as shown here. Each and every test case will have their own json file. Check this article here for more on test data design.

{
  "existingUser": false,
  "user":{
    "firstName":"automation",
    "lastname":"guru",
    "username":"guru001",
    "password":"password1"
  },
  "product":{
    "searchCriteria":"book",
    "price":"14.00"
  },
  "paymentInfo":{
    "method":"CC",
    "cardNumber":"4111111111111111",
    "expiry":"0430",
    "cvv":"123"
  }
}

Test Design:

First I create a class which holds all the pages. I assume that there is a TestData class which retrieves the above data from the json file. If it is not clear, please check this article on the Test Data design.

public class ApplicationPages {

    private LoginPage loginPage;
    private RegistrationPage registrationPage;
    private HomePage homePage;
    private ProductSearchPage productSearchPage;
    private PaymentInfoPage paymentInfoPage;
    private ConfirmationPage confirmationPage;
    private ProductViewPage productViewPage;
    private LogoutPage logoutPage;

    public ApplicationPages(WebDriver driver){
        this.loginPage = new LoginPage(driver);
        this.registrationPage = new RegistrationPage(driver);
        this.homePage = new HomePage(driver);
        this.productSearchPage = new ProductSearchPage(driver);
        this.paymentInfoPage = new PaymentInfoPage(driver);
        this.confirmationPage = new ConfirmationPage(driver);
        this.productViewPage  = new ProductViewPage(driver);
        this.logoutPage = new LogoutPage(driver);
    }


    public final UnaryOperator<TestData> userLoginPage = (d) -> {
        if(d.isExistingUser()) {
            assertTrue(loginPage.isAt());
            loginPage.setUsername(d.getUsername());
            loginPage.setPassword(d.getPassword());
            loginPage.signin();
        }else{
            loginPage.goToRegistrationPage();
        }
        return d;
    };

    public final UnaryOperator<TestData> userRegistrationPage = (d) -> {
        if(!d.isExistingUser()){
            assertTrue(registrationPage.isAt());
            registrationPage.setUsername(d.getUsername());
            registrationPage.setPassword(d.getPassword());
            registrationPage.register();
        }
        return d;
    };

    public final UnaryOperator<TestData> userHomePage = (d) -> {
        assertTrue(homePage.isAt());
        if(d.getProductSearchCriteria() != null){
            homePage.goToProductSearchPage();
        }else if(d.getOrderNumber() != null){
            homePage.goToProductView(d.getOrderNumber());
        }
        return d;
    };

    public final UnaryOperator<TestData> userProductSearchPage = (d) -> {
        if(d.getProductSearchCriteria() != null){
            assertTrue(productSearchPage.isAt());
            productSearchPage.search(d.getProductSearchCriteria());
            productSearchPage.selectProduct();
            d.isProductSelected(true);
        }
        return d;
    };

    public final UnaryOperator<TestData> orderPaymentInfoPage = (d) -> {
        if(d.getProductPrice() > 0){
            assertTrue(paymentInfoPage.isAt());
            paymentInfoPage.enterCC();
            paymentInfoPage.submit();
        }
        return d;
    };

    public final UnaryOperator<TestData> orderConfirmationPage = (d) -> {
        if(d.isProductSelected()){
            assertTrue(confirmationPage.isAt());
            d.setOrderNumber(confirmationPage.getOrderNumber());
            confirmationPage.clickOnViewProduct();
        }
        return d;
    };

    public final UnaryOperator<TestData> userProductViewPage = (d) -> {
        if(d.getOrderNumber() != null){
            assertTrue(productViewPage.isAt());
            assertEquals(d.getOrderNumber(), productViewPage.getOrderNumber());
            productViewPage.logout();
        }
        return d;
    };

    public final UnaryOperator<TestData> userLogoutPage = (d) -> {
        assertTrue(logoutPage.isAt());
        return d;
    };

}

Then we create the test class which chains all the pages as shown here and pass the test data to the first handler. Rest will be taken care by the handlers/individual pages depends on the application workflow.

public class ApplicationWorkflowTest {

    private ApplicationPages app;

    @Test
    public void workFlowTest(){
        TestData testData = TestData.get("TC001");
        this.app = new ApplicationPages(DriverManager.getDriver("chrome"));
        this.getAppWorkflow().apply(testData);
    }
    
    private Function<TestData, TestData> getAppWorkflow() {
        return app.userLoginPage.andThen(app.userRegistrationPage)
                                .andThen(app.userHomePage)
                                .andThen(app.userProductSearchPage)
                                .andThen(app.orderPaymentInfoPage)
                                .andThen(app.orderConfirmationPage)
                                .andThen(app.userProductViewPage)
                                .andThen(app.userLogoutPage);
    }

}

We do not need to create multiple test classes each possible work flow. Above test class is enough for new user registration, existing user login, free product flow etc.

Summary:

Chain Of Responsibility is extremely useful when there are multiple dynamic pages in the business work flow. The test does not really handle the business workflow complexity in the above example! The test is really simple with single test method.  The workflow chain takes care of that. Whenever a new page is introduced, we need to include the page in the chain. No need to create any separate test class. Instead create a test json file to provide test data to cover the page.

Happy Testing & Subscribe 🙂


Share This:

Selenium WebDriver – Real Time Test Execution Results Using Elasticsearch & Kibana

$
0
0

Overview:

Running automated regression on a daily basis as part of daily build is inevitable nowadays! It is cool to find & report the issues as soon as they are introduced. But it is very painful to maintain hundreds of automated tests & remote parallel execution! Once you have a huge automated regression test suite in place, you might have split it into multiple test suites based on business modules and you might be running them in parallel as part of your daily automated regression. Most of these automated regression suites run in a remote VM and the test results are created / accessible only at the end of the test execution. Otherwise, you might need to look into jenkins console for the test execution results log to see the progress. It might be annoying in certain cases. It might be cool to have an application which gives us the test execution results while the tests are being executed in the remote VMs.

Lets see how we could create a simple test execution results page and a dashboard using ElasticSearch & Kibana.

Elasticsearch:

ElasticSearch is basically a document storage and a Search Engine which exposes REST API for storing and retrieving results based on our query. More info on Elasticsearch is here. To setup Elasticsearch, use docker or check the installation page on the Elasticsearch site for the instructions for your OS.

docker run -p 9200:9200 -p 9300:9300 -e "discovery.type=single-node" docker.elastic.co/elasticsearch/elasticsearch:6.2.2

Kibana:

Kibana is a front-end application for Elasticsearch. It is basically a data visualization tool for your elasticsearch data. More info on Kibana is here. To setup kibana using docker,

docker run -p 5601:5601 -e ELASTICSEARCH_URL=http://[IP where elasticsearch is running]:9200 docker.elastic.co/kibana/kibana:6.2.2

Maven POM Dependencies:

I love Java & I have included below dependencies in my Maven pom file for the sample code I have included in this article. For other programming languages, continue reading this article to get an idea. This real time results setup can be done for any programming language. It is NOT specific to Java.

<dependency>
        <groupId>org.testng</groupId>
        <artifactId>testng</artifactId>
        <version>6.14.2</version>
    </dependency>
    <dependency>
        <groupId>com.fasterxml.jackson.core</groupId>
        <artifactId>jackson-databind</artifactId>
        <version>2.9.4</version>
    </dependency>
    <dependency>
        <groupId>com.mashape.unirest</groupId>
        <artifactId>unirest-java</artifactId>
        <version>1.4.9</version>
    </dependency>

Sample Test Class:

Lets create a simple test class as shown here.

public class SampleTest {

    @Test(description = "login")
    public void login(){

    }

    @Test(description = "search for flights", dependsOnMethods = "login")
    public void search(){

    }

    @Test(description = "select flight", dependsOnMethods = "search")
    public void select(){

    }

    @Test(description = "book flight", dependsOnMethods = "select")
    public void book(){

    }

    @Test(description = "logout", dependsOnMethods = "book")
    public void logout(){

    }
}

As soon as a test method is complete, I would like to get the status. Basically, I am looking for below information.

  • Name of test class is being executed
  • Name of the test method / description
  • Status of the test method (PASS / FAIL / SKIPPED)
  • Execution Date and Time.

So, Lets assume that our JSON structure to send the data to Elasticsearch would be more or less as shown here.

{
   "testClass":"com.tag.realtime.SampleTest",
   "description":"login",
   "status":"PASS",
   "executionTime":"2018-03-10T14:18:40.369"
}

You might want to include more info – like assertion results, exception details etc. Create a sample JSON file to get an idea and the information you want to send to Elasticsearch. Once you are done with your JSON structure, Lets create a simple class as shown below. This class is responsible for getting the information we would like to see in real time. This class instance would be serialized into a JSON using Jackson library.

public class TestStatus {

    @JsonProperty("testClass")
    private String testClass;

    @JsonProperty("description")
    private String description;

    @JsonProperty("status")
    private String status;

    @JsonProperty("executionTime")
    private String executionTime;

    public void setDescription(String description) {
        this.description = description;
    }

    public void setExecutionDate(String executionTime) {
        this.executionTime = executionTime;
    }

    public void setStatus(String status) {
        this.status = status;
    }

    public void setTestClass(String testClass) {
        this.testClass = testClass;
    }

}

Once we build our JSON, we need to post it into our Elasticsearch instance. Elasticsearch exposes REST APIs. I am creating another simple Java class ResultSender to convert above Java class to a JSON string and insert that into our Elasticsearch instance.

public class ResultSender {

    private static final ObjectMapper OM = new ObjectMapper();
    private static final String CONTENT_TYPE = "Content-Type";
    private static final String CONTENT_TYPE_VALUE = "application/json";
    private static final String ELASTICSEARCH_URL = "http://localhost:9200/app/suite"; 
    
    public static void send(final TestStatus testStatus){
        try {
            Unirest.post(ELASTICSEARCH_URL)
                    .header(CONTENT_TYPE, CONTENT_TYPE_VALUE)
                    .body(OM.writeValueAsString(testStatus)).asJson();
        } catch (Exception e) {
            e.printStackTrace();
        }
    }
    
}

Now we are ready with building JSON file and posting into our Elasticsearch instance. We still need a listener between our test class and ‘ResultSender’ – which is responsible for monitoring the test execution and calling the ‘ResultSender’ to send the results as soon as a test method is complete. So, Lets create a listener class as shown below.

public class ExecutionListener implements ITestListener {

    private TestStatus testStatus;

    public void onTestStart(ITestResult iTestResult) {
        this.testStatus = new TestStatus();
    }

    public void onTestSuccess(ITestResult iTestResult) {
        this.sendStatus(iTestResult,"PASS");
    }

    public void onTestFailure(ITestResult iTestResult) {
        this.sendStatus(iTestResult,"FAIL");
    }

    public void onTestSkipped(ITestResult iTestResult) {
        this.sendStatus(iTestResult,"SKIPPED");
    }

    public void onTestFailedButWithinSuccessPercentage(ITestResult iTestResult) {
        //skip
    }

    public void onStart(ITestContext iTestContext) {
        //skip
    }

    public void onFinish(ITestContext iTestContext) {
        //skip
    }

    private void sendStatus(ITestResult iTestResult, String status){
        this.testStatus.setTestClass(iTestResult.getTestClass().getName());
        this.testStatus.setDescription(iTestResult.getMethod().getDescription());
        this.testStatus.setStatus(status);
        this.testStatus.setExecutionDate(LocalDateTime.now().toString());
        ResultSender.send(this.testStatus);
    }

}

Add the listener on your test classes as shown here.  If you have multiple test classes, you could include the listener in the test suite file instead of adding ‘@Listeners’ for each and every test classes.

@Listeners(ExecutionListener.class)
public class SampleTest {
    // test methods
}

Now everything seems to be ready to send some data to Elasticsearch. Run the test and ensure that you do not get any exception due to the above setup. If everything is fine, access Kibana UI using below URL.

http://localhost:5601

Kibana – Creating Index Pattern:

Before we perform any search, It is necessary to create an index pattern in Kibana. Go to Management tab and create an index pattern as shown here.

kibana-index-creation-01

Click on the Next Step

kibana-index-creation-02

Click on the ‘Create Index Pattern’.

Kibana – Discover Tab:

We can get the test method execution results in the discover tab. Kibana would have already queried Elasticsearch for the results based on the index pattern we had created.

Kibana – Visualize Tab:

To create a dashboard with some test execution results, lets create few visualizations.

Kibana – Dashboard Tab:

Lets finally create the dashboard which gives us the real time results while tests are being executed.

End-To-End Verification:

Lets do one final verification to ensure that everything works and we could get real time results while the tests are being executed. Kibana is set to refresh every 5 seconds. So, there will be a 5 seconds delay in worst case scenario which is OK.


Summary:

Setting up real time results using Elasticsearch and Kibana is very easy. It requires only very minimal change in your existing framework. This set up could avoid a lot of team’s frustration if they are currently monitoring the results via console output / logging into the remote machine for results analysis. This article gives only a high level idea. You could further enhance this by including more info like assertion results, add additional filters to refresh the charts data for specific tests etc.

Happy Testing & Subscribe 🙂


Share This:

Selenium WebDriver – How To Improve Test Performance Using Java8 Stream

$
0
0

Overview:

What do we normally do to reduce the overall test execution time once you have hundreds of automated tests in our regression suite? Mostly we all go for spinning up multiple VMs to run our automated tests in parallel or we would increase thread count for parallel execution in a single VM. Don’t we? Have we ever tried to reduce the test execution time of a single test? [Assuming you do not have any explicit hard coded wait statements. If you have any, check this]

Lets see how it can be done using Java8 Stream!

Sample Application:

As usual, to explain things better, I am considering this static page. When we click on these buttons, we see a notification on the right top corner of the application where each notification message is displayed for approximately 4 seconds!

stream-prob-statement

Lets assume that our aim is to verify this functionality of the application.

Sample Page Object:

I create a simple page object considering only those 4 buttons and the corresponding 4 notification alerts. Our validation will be success only if the notification message/alert is displayed and it also hides within 5 seconds.

public class SamplePage {

    private final WebDriver driver;

    @FindBy(css="div.button-box button.btn-info")
    private WebElement btnInfo;

    @FindBy(css="div.button-box button.btn-warning")
    private WebElement btnWarning;

    @FindBy(css="div.button-box button.btn-success")
    private WebElement btnSuccess;

    @FindBy(css="div.button-box button.btn-danger")
    private WebElement btnDanger;

    @FindBy(css="div.jq-icon-info")
    private WebElement infoAlert;

    @FindBy(css="div.jq-icon-warning")
    private WebElement warningAlert;

    @FindBy(css="div.jq-icon-success")
    private WebElement successAlert;

    @FindBy(css="div.jq-icon-error")
    private WebElement dangerAlert;

    public SamplePage(final WebDriver driver){
        this.driver = driver;
        PageFactory.initElements(driver, this);
    }

    public void goTo(){
        this.driver.get("https://wrappixel.com/demos/admin-templates/admin-pro/main/ui-notification.html");
    }

    public boolean validateInfoAlert(){
        return this.validate(btnInfo,infoAlert);
    }

    public boolean validateWarningAlert(){
        return this.validate(btnWarning,warningAlert);
    }

    public boolean validateSuccessAlert(){
        return this.validate(btnSuccess, successAlert);
    }

    public boolean validateDangerAlert(){
        return this.validate(btnDanger, dangerAlert);
    }

    private boolean validate(WebElement button, WebElement notification) {
        button.click();
        boolean result = notification.isDisplayed();

        try{
            Awaitility.await()
                    .atMost(5, TimeUnit.SECONDS)
                    .until(() -> !notification.isDisplayed());
        }catch(Exception e){
            result = false;
        }
        return result;
    }

}

Now It is time for us to create a Test class to test this feature.

Sample Test:

public class NotificationTest {

    private WebDriver driver;
    private SamplePage samplePage;


    @BeforeTest
    public void init(){
        this.driver = DriverManager.getDriver();
        this.samplePage = new SamplePage(driver);
        this.samplePage.goTo();
    }

    @Test
    public void test(){
        Assert.assertTrue(this.samplePage.validateInfoAlert());
        Assert.assertTrue(this.samplePage.validateWarningAlert());
        Assert.assertTrue(this.samplePage.validateSuccessAlert());
        Assert.assertTrue(this.samplePage.validateDangerAlert());
    }

    @AfterTest
    public void tearDown(){
        this.driver.quit();
    }

}

Test Execution:

Lets execute the test. As you see in this video, the test runs just fine as we expected. However as part of the notification validation, we spend around 16 seconds to validate these alerts.

Our script does not have any hard coded wait statement. Can we still the improve the performance here?

Of course, we can. That is what we are going to see in this article.

Abstract Element Validator:

First we need to wrap any type of validations object to a specific abstract type. So, I create a simple abstract class as shown here.

public abstract class ElementValidator {
    public abstract boolean validate();
}

Since we are validating the notifications, I create below class by extending the above abstract class.

Notification Validator:

public class NotificationValidator extends ElementValidator {

    private final WebElement button;
    private final WebElement notification;

    public NotificationValidator(final WebElement button, final WebElement notification){
        this.button = button;
        this.notification = notification;
    }

    @Override
    public boolean validate() {
        this.button.click();
        boolean result = this.notification.isDisplayed();

        Awaitility.await()
                .atMost(5, TimeUnit.SECONDS)
                .until(() -> !this.notification.isDisplayed());
        
        return result && (!this.notification.isDisplayed());
    }
    
}

Page Object:

Our SamplePage class is modified to return the list of validation objects.

public class SamplePage {

    private final WebDriver driver;

    //all findby elements are here
 
    public SamplePage(final WebDriver driver){
        this.driver = driver;
        PageFactory.initElements(driver, this);
    }

    public void goTo(){
        this.driver.get("https://wrappixel.com/demos/admin-templates/admin-pro/main/ui-notification.html");
    }

    public List<ElementValidator> getElementValidators(){
        List<ElementValidator> elements = new ArrayList();
        elements.add(new NotificationValidator(btnInfo, infoAlert));
        elements.add(new NotificationValidator(btnWarning,warningAlert));
        elements.add(new NotificationValidator(btnSuccess, successAlert));
        elements.add(new NotificationValidator(btnDanger, dangerAlert));
        return elements;
    }

}

Sample Test:

Note the test method in the below class. I get the list of ElementValidator & then iterate using parallel stream and call the ‘validate’ method.

public class NotificationParallelTest {

    private WebDriver driver;
    private SamplePage samplePage;


    @BeforeTest
    public void init(){
        this.driver = DriverManager.getDriver();
        this.samplePage = new SamplePage(driver);
        this.samplePage.goTo();
    }

    @Test
    public void test(){
        this.samplePage.getElementValidators()  //list of element validators
                .stream()                       //iterate
                .parallel()                     //
                .map(ElementValidator::validate)//call the validate method
                .forEach(Assert::assertTrue);   //result should be true
    }

    @AfterTest
    public void tearDown(){
        this.driver.quit();
    }

}

Now, we spend only 4 seconds to validate these notification messages.

Why Abstract Class?

You might wonder why we need an abstract class here. Why can we not simply send a List<NotificationValidator> Instead of List<ElementValidator>? The answer is simple. We do NOT want to make the validation specific to Notification. Instead, it is good if it is generic.

Lets consider another example in the page. Now we got an additional requirement to validate – after clicking on the ‘X’ on the below alerts messages, they should disappear!

stream-prob-statement-1

Now you could understand that we might not be able to reuse NotificationValidator class. But we could extend ElementValidator class.

public class DissmissalAlertValidatior extends ElementValidator {

    private final WebElement dissmissalSection;

    public DissmissalAlertValidatior(final WebElement component){
        this.dissmissalSection = component;
    }

    @Override
    public boolean validate() {

        //all messages should be displayed first; the below result is true
        boolean result = this.dissmissalSection.findElements(By.cssSelector("button.close"))
                .stream()
                .allMatch(WebElement::isDisplayed);

        //close all the messages
        this.dissmissalSection.findElements(By.cssSelector("button.close"))
                .stream()
                .forEach(WebElement::click);

        //none of the messages should be displayed now
        result = result && this.dissmissalSection.findElements(By.cssSelector("button.close"))
                .stream()
                .noneMatch(WebElement::isDisplayed);

        return result;
    }
}

Page Object:

To support the additional requirement, my page has to return the additional validators in the list.

@FindBy(css="div.col-lg-4:nth-child(2)")
private WebElement dissmissalSection;

@FindBy(css="div.col-lg-4:nth-child(3)")
private WebElement alertWithImageIcon;


public List<ElementValidator> getElementValidators(){
    List<ElementValidator> elements = new ArrayList();
    elements.add(new NotificationValidator(btnInfo, infoAlert));
    elements.add(new NotificationValidator(btnWarning,warningAlert));
    elements.add(new NotificationValidator(btnSuccess, successAlert));
    elements.add(new NotificationValidator(btnDanger, dangerAlert));

    //2 additonal validators
    elements.add(new DissmissalAlertValidatior(dissmissalSection));
    elements.add(new DissmissalAlertValidatior(alertWithImageIcon));
    return elements;
}

The Test class remains unchanged.  Lest run the test.


As you could see, we validated everything in the page without affecting the performance of our test!

Summary:

By carefully analyzing our test requirements and designing page objects appropriately with proper design principles, we could create highly reusable components and minimize the overall automation maintenance effort & test execution time. The above approach might work if we spend more time on a single page. But you might not be able to use this approach for 2 buttons when the onclick events of those buttons lead to different pages. So, a proper analysis is required. Main idea of the article is to show you that increasing the number of threads for your test classes / spinning up VMs are not the only options to reduce the test execution time.

Happy Testing & Subscribe 🙂


Share This:

Selenium WebDriver – How To Generate Test Data Using JFairy

$
0
0

Overview:

One of the challenges in software testing is to come up with test data to more or less look like real data. Often test automation engineers overlook the importance of test data in their test script. For example, They tend to write scripts like entering firstname1, lastname1 etc for the first name and last name fields. Even though this is OK for debugging purposes, You might miss some potential defects when you run the automation test scripts against the actual application under test. So, I would suggest you to use test data generation library to produce data at random which looks like real data.

Lets look at a Java library – JFairy – which could generate test data for our selenium test automation scripts.

JFairy:

It is a very simple library to produce test data at random which looks like real data. More info is here.

Include below maven dependency in your pom file.

<dependency>
    <groupId>io.codearte.jfairy</groupId>
    <artifactId>jfairy</artifactId>
    <version>0.5.9</version>
</dependency>

Examples:

  • To generate random person objects which could give us name, address, telephone number, age, DOB, email, passport number etc
//first create Fairy object. By default - Locale is English
Fairy fairy = Fairy.create();

//Create person object
Person person = fairy.person();

person.getFullName();
person.getAddress();
person.getAge();
person.getEmail();
person.getDateOfBirth();
person.getPassportNumber();
person.getCompanyEmail();
person.getNationalIdentityCardNumber();

When I tried to run the above code in a loop 3 times, It produces unique data every time which looks like real data.

Christopher Robles
106 Stillwell Avenue APT 171
Washington 29693
97
robles@yahoo.com
1920-06-20T23:52:14.933-05:00
wFNmlgnox
christopher.robles@furbainc.biz
787-29-0099
------------------------------------------------------
Nathaniel Barnett
93 Tabor Court APT 249
New York 46780
97
barnett@gmail.com
1920-10-13T13:20:39.103-05:00
1tIaHKoze
nathaniel.barnett@nonos.eu
059-17-1981
------------------------------------------------------
Aubree Mcintyre
178 Aster Court
Miami 61999
91
aubreemcintyre@yahoo.com
1926-11-15T04:59:48.768-06:00
C8cDSoSHH
aubree.mcintyre@datastorecompany.biz
151-63-1547
------------------------------------------------------

Locale Support:

JFairy not only supports English names – but also supports few other locales.  For example, below fairy object produces the test data based on the locale setting.

Fairy frFairy = Fairy.create(Locale.forLanguageTag("fr"));
Fairy svFairy = Fairy.create(Locale.forLanguageTag("sv"));
Fairy plFairy = Fairy.create(Locale.forLanguageTag("pl"));

For example, running above code for Fr locale,

Hector Verdier
Place de l'Église, 41
15284 Anglet
52
hectorverdier@orange.fr
1965-08-29T19:02:27.909-05:00
DRYDOdR9Q
hector.verdier@olgroupeeurl.gouv.fr
66634487-E

Fairy can create below objects & values based on that.

  • Person (See the example above)
  • Credit Card (CC Vendor, Expiry etc)
  • Network (IP address and random URLs)
  • Company (name, email, domain etc)
  • Date (Random dates in past, future, range)
  • Text (Random word, text, paragraph etc)
fairy.networkProducer().ipAddress();
fairy.textProducer().latinWord();
fairy.creditCard().getVendor();
fairy.company().getUrl();

produces below output.

12.205.88.19
pede consequat aliquet
Visa
http://www.quisuc.biz

Summary:

JFairy is a simple and small library. The objects will be fine for most of the cases to produce test data for your test automation scripts.


Happy Testing & Subscribe 🙂


Share This:


Selenium WebDriver – How To Improve Your Assertions Using AssertJ

$
0
0

Overview:

As you might already know,Fluent APIs make your code readable and easily maintainable. We already have seen few articles on designing Page Objects and Business Workflows in fluent style. In this article, Lets see how we could include fluent assert statements for your automated tests using AssertJ library. Take a look at the examples in this articles. You could easily compare that with your JUnit/TestNG assert statements and understand the benefits of using AssertJ.

AssertJ:

AssertJ is a simple assertion library for Java written in fluent style. It almost covers the assertions for all the possible data types. It also lets you to extend the library for your custom objects. It also lets you convert your existing JUnit/TestNG assert statements into AssertJ assert statements by using a shell script which is cool.

Maven:

To include AssertJ in your Java project, include below maven dependency in your pom file. Check the maven repo here for the latest versions.

<dependency>
    <groupId>org.assertj</groupId>
    <artifactId>assertj-core</artifactId>
    <version>3.9.1</version>
    <scope>test</scope>
</dependency>

Once you have included in your pom file, do the below static import in your test classes.

import static org.assertj.core.api.Assertions.assertThat;

Examples:

Lets start with few simple examples.

  • boolean check
boolean actual = false;

assertThat(actual).isTrue();
//or
assertThat(actual).isEqualTo(true);
  • Sting comparison.
@Test
public void stringCompare(){

    String expected = "Test Automation Guru";
    String actual   = "test automation guru";

    assertThat(actual).isEqualTo(expected);

}

Running the above code produces below output.

java.lang.AssertionError: 
Expecting:
 <"test automation guru">
to be equal to:
 <"Test Automation Guru">
but was not.

You can also include some meaningful description for your assert statements.

assertThat(actual).as("AssertJ String Comparison Check").isEqualTo(expected);

The above statement will display,

java.lang.AssertionError: [AssertJ String Comparison Check] 
Expecting:
 <"test automation guru">
to be equal to:
 <"Test Automation Guru">
but was not.
  • Not null / blank check.
assertThat(actual).isNotNull()
                  .isNotBlank();
  • Chaining various string checks.
assertThat(actual).doesNotStartWith("Test")
                  .doesNotEndWith("Guru")
                  .doesNotContain("automation")
                  .contains("assertj");
  • int comparison.
assertThat(10).isBetween(5,15);

assertThat(10).isPositive()
                     .isGreaterThan(8)
                     .isLessThan(12);
  • Dealing with date assertions are little bit annoying in general. AssertJ handles that very easily.
LocalDate today = LocalDate.now();
LocalDate yesterday = LocalDate.now().minusDays(1);
LocalDate tomorrow = LocalDate.now().plusDays(1);

assertThat(today).isAfter(yesterday).isBefore(tomorrow);
  • You can also use date in String format as shown here.
assertThat(today).isAfter("2015-01-01").isBefore("2016-12-31");
  • Chaining various date related assertions together.
Date today = new Date();
assertThat(today).hasMonth(3)
        .hasDayOfMonth(24)
        .hasHourOfDay(10)
        .hasMinute(15);
  • List compare
List<String> list = new ArrayList<>();
list.add("test");
list.add("automation");
list.add("guru");

assertThat(list).hasSize(3)  //passes
                .containsAnyOf("automation", "guru")  //passes
                .doesNotContain("test");   //fails as it contains test
  • List – order of elements should be same
//expected
List<String> expected = new ArrayList<>();
expected.add("guru");
expected.add("automation");
expected.add("test");

//actual
List<String> actual = new ArrayList<>();
actual.add("test");
actual.add("automation");
actual.add("guru");

//no change in the order check
assertThat(actual).containsExactly(expected.toArray(new String[expected.size()]));

It produces below output.

java.lang.AssertionError: 
Actual and expected have the same elements but not in the same order, at index 0 actual element was:
  <"test">
whereas expected element was:
  <"guru">
  • If the list order does not matter – as long as all the elements are present
//any order check
assertThat(actual).containsAll(expected);
//OR
assertThat(actual).containsExactlyInAnyOrder(expected.toArray(new String[expected.size()]));
  • File related checks.  First, I create a simple file with below content and save it as /home/vins/expected-file.txt
This is a sample file I am going to use for assertj comparison.
This file has multiple lines.
AssertJ is a cool library.
If you have not realized yet, may be you will now!
  • A simple presence check.
File expected = Paths.get("/home/vins/expected-file.txt").toFile();

assertThat(expected).exists()
                    .isFile()
                    .hasExtension("txt");
  • Comparing 2 file contents
File expected = Paths.get("/home/vins/expected-file.txt").toFile();
File actual = Paths.get("/home/vins/actual-file.txt").toFile();

assertThat(expected).hasSameContentAs(actual);
  • Lets assume that you have a CSV file as shown here on left side. You run your automated tests and downloads a new file which is ‘actual’ – but the file content is as shown here on right side. Basically they have same records. However the order has changed slightly. If you want to do an exact match, use the above file compare approach. If the records order do not matter, we will follow the same approach we did for list compare.

csv-files-compare

List<String > expected = Files.readAllLines(Paths.get("/home/qa/expected-file.csv"));
List<String > actual = Files.readAllLines(Paths.get("/home/qa/actual-file.csv"));

assertThat(actual).containsAll(expected);
  • Soft Assertions. You might already know what it means. In case, if you are not aware, The above assertions we had seen so far is hard assertion. When you have more than 1 assert statements, as soon as an assert statement fails, the remaining assert statements do not get executed. This behvaior is same for all AssertJ/JUnit and TestNG libraries. Soft Assertions on the other hand execute all the assert statements and provide the result of all assertions.
String expected = "Test Automation Guru";
String actual = "Test Automation Guru";

SoftAssertions.assertSoftly(s -> {
    s.assertThat(actual).doesNotContain("automation");
    s.assertThat(actual).doesNotStartWith("Test");
    s.assertThat(actual).doesNotEndWith("Guru");
    s.assertThat(actual).isEqualTo(expected);
});

It produces below output.

The following 2 assertions failed:
1) 
Expecting:
  <"Test Automation Guru">
not to start with:
  <"Test">

at AssertJTest.lambda$stringCompare$0(AssertJTest.java:31)
2) 
Expecting:
  <"Test Automation Guru">
not to end with:
  <"Guru">

at AssertJTest.lambda$stringCompare$0(AssertJTest.java:32)


Custom Assertion:

As you have seen above, AssertJ covers most of the data types for your assertions. It might be more than enough for our Selenium automated tests. For example, if we need to check if a WebElement is displayed.

WebElement element = driver.findElement(By.id("id"));

//isDisplayed check
assertThat(element.isDisplayed()).isTrue();

However, it would be cool to have a separate assertion library for WebElement – to maintain a well readable and reusable code.

To implement your own assertion, create a new class by extending AbstractAssert class. Check this below sample for WebElement assertion.

public class WebElementAssert extends AbstractAssert<WebElementAssert, WebElement> {

    public WebElementAssert(WebElement webElement) {
        super(webElement, WebElementAssert.class);
    }

    public static WebElementAssert assertThat(WebElement webElement){
        return new WebElementAssert(webElement);
    }

    public WebElementAssert isDisplayed(){
        isNotNull();

        //check condition
        if(!actual.isDisplayed()){
            failWithMessage("Expected element to be displayed. But was not!!");
        }

        return this;
    }

    public WebElementAssert isEnabled(){
        isNotNull();

        //check condition
        if(!actual.isEnabled()){
            failWithMessage("Expected element to be enabled. But was not!!");
        }

        return this;
    }

    public WebElementAssert isButton(){
        isNotNull();

        //check condition
        if(!(actual.getTagName().equalsIgnoreCase("button") || actual.getAttribute("type").equalsIgnoreCase("button"))){
            failWithMessage("Expected element to be a button. But was not!!");
        }

        return this;
    }

    public WebElementAssert isLink(){
        isNotNull();

        //check condition
        if(!actual.getTagName().equalsIgnoreCase("a")){
            failWithMessage("Expected element to be a link. But was not!!");
        }

        return this;
    }

    public WebElementAssert hasAttributeValue(String attr, String value){
        isNotNull();

        //check condition
        if(!actual.getAttribute(attr).equals(value)){
            failWithMessage("Expected element to have attr <%s> value as <%s>. But was not!!", attr, value);
        }

        return this;
    }

}

Now lets use our assertion library.

//Launching a site and finding a button element
WebDriver driver = DriverManager.getDriver();
driver.get("https://wrappixel.com/demos/admin-templates/admin-pro/main/ui-notification.html");
WebElement element = driver.findElement(By.cssSelector("div.button-box button.btn-info"));

//expecting a button element to be displayed, enabled and to be a link
assertThat(element).isDisplayed()
                  .isEnabled()
                  .isLink();

Since the element was not a link, it is expected to fail.

java.lang.AssertionError: Expected element to be a link. But was not!!

If I chnage the assertion, It passes.

assertThat(element).isDisplayed()
                    .isEnabled()
                    .isButton()
                    .hasAttributeValue("class", "tst1 btn btn-info");


Summary:

AssertJ is one of the coolest libraries we have in Java. It makes your test automation script well readable and easily maintainable by chaining various assertions. If you have already implemented all your assertions using JUnit/TestNg, No worries! AssertJ provides an utility to convert all your assertions to assertj assertions.

Lets write better code and have a robust test script!


Happy Testing & Subscribe 🙂


Share This:

Selenium WebDriver – Design Patterns in Test Automation – Execute Around Method Pattern

$
0
0

Overview:

As a software engineer, We all face some errors/exceptions while writing code! So what do we do when we face such a problem? If we are not sure, We google for solutions immediately. Don’t we? We google because we know that we would not be alone and someone would have already found the solution, for the problem we are facing now, which we could use to solve our problem.

Well, What to do if we face an issue in the high level software design – when connecting different classes / modules – when you have only a vague idea!! How can we google such things when we ourselves are not sure of the problem we have in the first place!!

No worries, You still have a solution!

Design patterns are the solutions for the problems which you might face in the software design!!

Design Patterns are well optimized and reusable solutions to a given problem in the software design. It helps us to show the relationship among the classes and the way in which they interact. Design pattern is a template which you have to carefully analyze and use it in appropriate places.

More information on design pattern can be found here.

Design Patterns in Test Automation:

As an automated test engineer, should we really care about design principles and patterns? Why do we need to learn/use Design Patterns in functional test automation?

After all, Test automation framework/automated test case is also a software which is used to test another software. So, we could apply the same design principles/patterns in our test automation design as well to come up with more elegant solution for any given design related problem in the test automation framework.

Remember that Design Patterns are NOT really mandatory. So you do not have to use them! But when you learn them, you would know exactly when to use! Basically these are all well tested solutions. So when you come across a problem while designing your framework/automated test cases, these design patterns could immediately help you by proving you a formula / template & saves us a lot of time and effort.

Note: Your aim should not be to implement a certain pattern in your framework. Instead, identify a problem in the framework and then recognize the pattern which could be used to solve the problem. Do not use any design pattern where it is not really required!!

In this article, We are going to see where we could use the Execute Around Pattern.

Execute Around Pattern:

Execute Around pattern frees the user from calling certain steps which need to be executed before and after business logic. Here business logic could be any user action on a web page / web element.

For example: Let’s consider a button on a web page. Whenever you click on a button, it launches a new window. Now you need to take an action/verify some text on the new window. Once the action/verification is done, you close the ‘new window’.

  1. Click on a button on Page A.
  2. It launches new Window – Page B.
  3. Do a WebDriver switch to Page B.
  4. Take action on Page B.
  5. Do a WebDriver switch to Page A again.

Here, step 3 is required to take action on Page B. Similarly once the verification is done on Page B, you need to switch the driver back to Page A. Here the switch does not add any value to your tests. But they are required to take appropriate action on the page.

You might end up having tons of switch statements if you have to deal with multiple windows / frames in your test automation.

Lets see how we could leverage Execute Around Method pattern to simplify this.

Sample Application:

To explain things better, I am creating few dummy html pages as shown here.

  • There is a main page which has links to launch others pages A, B and C in a separate windows.
  • All these pages have some fields & Lets assume that we need to fill these fields.

execute-around-sample-appn-01

Main Page:

The page object for the above main page is as shown here.

public class MainPage {

    private final WebDriver driver;

    @FindBy(id = "pageA")
    private WebElement pageALink;

    @FindBy(id = "pageB")
    private WebElement pageBLink;

    @FindBy(id = "pageC")
    private WebElement pageCLink;


    public MainPage(final WebDriver driver){
        this.driver = driver;
        PageFactory.initElements(driver, this);
    }

    public void goTo(){
        this.driver.get("file:///home/vins/execute-around/main.html");
    }

    public void launchPageA(){
        this.pageALink.click();
    }

    public void launchPageB(){
        this.pageBLink.click();
    }

    public void launchPageC(){
        this.pageCLink.click();
    }

}

Window Annotation:

I am creating an annotation – the main idea here is to find the window based on the browser title.

import static java.lang.annotation.ElementType.TYPE;
import static java.lang.annotation.RetentionPolicy.RUNTIME;
import java.lang.annotation.Retention;
import java.lang.annotation.Target;


@Target({
        TYPE
}) @Retention(RUNTIME)
public @interface Window {
    String value() default "";
}

DriverUtil:

This DriverUtil class is responsible for switching to appropriate window based on the string we provide for the Window annotation.

public class DriverUtil {

    public static void switchToWindow(WebDriver driver, int index) {
        String handle = driver.getWindowHandles().toArray(new String[0])[index];
        driver.switchTo().window(handle);
    }

    public static void switchToWindow(WebDriver driver, Class<?> clazz) {
        String title = clazz.getAnnotation(Window.class).value();
        switchToWindow(driver, title);
    }

    private static void switchToWindow(final WebDriver driver, final String title){
        driver.getWindowHandles()
                .stream()
                .map(h -> driver.switchTo().window(h).getTitle())
                .filter(title::contains)
                .findFirst()
                .orElseThrow(() -> {
                    throw new RuntimeException("No Such Window");
                });
    }

}

Page A / B / C:

I create separate page objects for Page A, B and C as shown here.

@Window("Page A")
public class PageA {

    private final WebDriver driver;

    @FindBy(name="fn")
    private WebElement fn;

    @FindBy(name="ln")
    private WebElement ln;

    @FindBy(name="addr")
    private WebElement addr;

    public PageA(final WebDriver driver){
        this.driver = driver;
        PageFactory.initElements(driver, this);
    }

    //execute around method pattern
    public void onNewWindow(Consumer<PageA> consumer){
        DriverUtil.switchToWindow(driver, this.getClass());
        consumer.accept(this);
        DriverUtil.switchToWindow(driver, 0);
    }

    public void setFn(String val){
        fn.sendKeys(val);
    }

    public void setLn(String val){
        ln.sendKeys(val);
    }

    public void setAddr(String val){
        addr.sendKeys(val);
    }

}

Take a closer look at the onNewWindow method.  Here PageA knows that it is a page object for a separate window which has the title as ‘Page A’. The user (the test classes), whoever is going to use this, would have to switch to its window to take action on this page. Once all the actions to be taken on this page are done, then it simply switches the user to the Main window.  This is exactly what execute-around-method pattern describes. Execute Around pattern frees the user from calling certain steps which need to be executed before and after business logic.

Sample Test:

Lets create a simple test to test the workflow.

public class SwitchTest {

    private WebDriver driver;
    private MainPage mainPage;
    private PageA pageA;
    private PageB pageB;
    private PageC pageC;

    @BeforeTest
    public void init(){
        this.driver = DriverManager.getDriver();
        this.mainPage = new MainPage(driver);
        this.pageA = new PageA(driver);
        this.pageB = new PageB(driver);
        this.pageC = new PageC(driver);
    }

    @Test
    public void test(){
        this.mainPage.goTo();
        this.mainPage.launchPageA();
        this.mainPage.launchPageB();
        this.mainPage.launchPageC();

        this.pageA.onNewWindow(a -> {
            a.setFn("Test");
            a.setLn("Test");
            a.setAddr("Test");
        });
        
        this.pageB.onNewWindow(b -> {
            b.setFn("Automation");
            b.setLn("Automation");
            b.setAddr("Automation");
        });

        this.pageC.onNewWindow(c -> {
            c.setFn("Guru");
            c.setLn("Guru");
            c.setAddr("Guru");
        });

    }

    @AfterTest
    public void tearDown(){
        this.driver.quit();
    }
}

Lets see how it executes. Please note that I have included hard coded wait statements while running this test – so that we could see how the switch happens.


Lets see how the below test works.

this.mainPage.goTo();
this.mainPage.launcPageA();
this.mainPage.launcPageB();
this.mainPage.launcPageC();

this.pageA.onNewWindow(a -> {
    a.setFn("Test");
});

this.pageB.onNewWindow(b -> {
    b.setFn("Automation");
});

this.pageC.onNewWindow(c -> {
    c.setFn("Guru");
});

this.pageA.onNewWindow(a -> {
    a.setLn("Test");
});

this.pageB.onNewWindow(b -> {
    b.setLn("Automation");
});

this.pageC.onNewWindow(c -> {
    c.setLn("Guru");
});

this.pageA.onNewWindow(a -> {
    a.setAddr("Test");
});

this.pageB.onNewWindow(b -> {
    b.setAddr("Automation");
});

this.pageC.onNewWindow(c -> {
    c.setAddr("Guru");
});


As you could see, the test classes do not have to worry about switching to a specific window. They can call all the methods on the specific page object. Driver switch happens like magic behind the scenes. Switching window is handled before and after test actions are executed.

We could use the same pattern for handling with Frames in page objects as well.

Main Page with Frames:

<html>
<head><title>Main</title></head>
  <frameset cols="33%,33%,33%">
  <frame id="a" src="pageA.html">
  <frame id="b" src="pageB.html">
  <frame id="c" src="pageC.html">
</frameset>
</html>

execute-around-sample-appn-02

Main Page:

I modify the main page object as shown here.


public class MainPage {

    private final WebDriver driver;

    @FindBy(id = "a")
    private WebElement frameA;

    @FindBy(id = "b")
    private WebElement frameB;

    @FindBy(id = "c")
    private WebElement frameC;


    public MainPage(final WebDriver driver){
        this.driver = driver;
        PageFactory.initElements(driver, this);
    }

    public void goTo(){
        this.driver.get("file:///home/qa/workspace/execute-around/main.html");
    }

    public void onFrameA(Consumer<WebDriver> consumer){
        this.onFrame(consumer,frameA);
    }

    public void onFrameB(Consumer<WebDriver> consumer){
        this.onFrame(consumer,frameB);
    }

    public void onFrameC(Consumer<WebDriver> consumer){
        this.onFrame(consumer,frameC);
    }

    private void onFrame(Consumer<WebDriver> consumer, WebElement element){
        this.driver.switchTo().frame(element);
        consumer.accept(driver);
        this.driver.switchTo().defaultContent();
    }

}

The test is as shown here.

this.mainPage.goTo();

this.mainPage.onFrameA(frameA -> {
    frameA.findElement(By.name("fn")).sendKeys("test");
    frameA.findElement(By.name("ln")).sendKeys("automation");
    frameA.findElement(By.name("addr")).sendKeys("guru");
});

this.mainPage.onFrameB(frameB -> {
    frameB.findElement(By.name("fn")).sendKeys("test");
    frameB.findElement(By.name("ln")).sendKeys("automation");
    frameB.findElement(By.name("addr")).sendKeys("guru");
});

this.mainPage.onFrameC(frameC -> {
    frameC.findElement(By.name("fn")).sendKeys("test");
    frameC.findElement(By.name("ln")).sendKeys("automation");
    frameC.findElement(By.name("addr")).sendKeys("guru");
});

Lets execute the test and see how the driver switches to the frame.


Summary:

As you could see, execute around method pattern hides the complex logic of switching to frames / windows etc. The user does not have to worry about switching and instead just focuses on business logic. It makes both page objects and test classes look clean and neat.

Happy Testing & Subscribe 🙂


Share This:

Selenium WebDriver – How To Distribute Docker Images – Part 3

$
0
0

Overview:

The modern cloud infrastructure, continuous integration & deployment processes etc have completely changed the way how applications are deployed in production nowadays. In order to release new features faster in Production, you need to reduce time we take in the each phase of the SDLC. As an automation lead/architect, It could be your responsibility to have a proper infrastructure to speed up the automated test execution! When it comes to infrastructure automation, Docker plays a major role there!

Testautomationguru already has few docker and selenium related articles which talks about setting up the dockerized selenium grid & running a docker container with a test.

  1. Setting up Dockerized Selenium grid.
  2. Running Automated Tests Inside A Docker Container – Part 1
  3. Selenium WebDriver – How To Run Multiple Test Suites Using Docker Compose – Part 2

Before continuing this article, I would request you to read the above 3 articles first! I am explaining few things here assuming that you have already read them.

Docker Registry:

Docker registry is simply a storage place of all the docker images through which you could share image with others. Docker registry helps us to version our images with specific tags. So, multiple versions of images could be maintained in Docker Registry and any specific version can be pulled from the registry and used.

Docker Hub:

Docker Hub is a public could based registry maintained by docker inc. You need to create an account in docker-hub to push your images. Public images are free. Private images require some fee which is not very significant!

Maven Docker Plugin:

Updating with credentials:

In order to push the docker image to Docker Hub – you need to provide the docker hub credentials as shown here.

<plugin>
    <groupId>com.spotify</groupId>
    <artifactId>dockerfile-maven-plugin</artifactId>
    <version>1.4.0</version>
    <executions>
        <execution>
            <id>default</id>
            <goals>
                <goal>build</goal>
                <goal>push</goal>
            </goals>
        </execution>
    </executions>
    <configuration>
        <username>username</username>
        <password>password</password>               
        <repository>vinsdocker/containertest</repository>
        <tag>demo</tag>
    </configuration>
</plugin>

If you are not comfortable in placing the credentials in the pom file, you could place that in the  ~/.m2/settings.xml. 

  • If settings.xml is not present in the above location, then copy from MVN_HOME/conf/settings.xml and place it inside the .m2 directory.
  • Then add the credentials as shown here.
<servers>
   <server>
      <id>docker.io</id>
      <username>username</username>
      <password>password</password>
   </server>
</servers>

Usually this set up should be done on the Jenkins slave node which is building the image.

Building and Pushing an Image:

Issuing following command builds the image with our selenium page objects and tests with all the dependencies.  Once the image is built, it is pushed to the docker hub.

mvn clean package dockerfile:push -DskipTests
[INFO]                                                                         
[INFO] ------------------------------------------------------------------------
[INFO] Building container-test 0.0.1-SNAPSHOT
[INFO] ------------------------------------------------------------------------
[INFO] 
[INFO] --- dockerfile-maven-plugin:1.4.0:push (default-cli) @ container-test ---
[INFO] The push refers to a repository [docker.io/vinsdocker/containertest]
[INFO] Image 52bc4d47e0e5: Preparing
[INFO] Image fa5377bafc12: Preparing
[INFO] Image c43becf4cc27: Preparing
[INFO] Image a784c47d5471: Preparing
[INFO] Image d1ec1b1ff3b5: Waiting
[INFO] Image 6df67175164b: Waiting
[INFO] Image 3358360aedad: Waiting
[INFO] Image fa5377bafc12: Pushing
[INFO] Image 52bc4d47e0e5: Pushing
[INFO] Image 3358360aedad: Pushed
[INFO] Image d1ec1b1ff3b5: Pushed
[INFO] demo: digest: sha256:1dc1326cb3892c9d00202c22daa557a677cdaf2e21468b114cbe85e766ddf47b size: 2409
[INFO] ------------------------------------------------------------------------
[INFO] BUILD SUCCESS
[INFO] ------------------------------------------------------------------------
[INFO] Total time: 01:18 min
[INFO] Finished at: 2018-04-14T12:09:02-05:00
[INFO] Final Memory: 26M/336M
[INFO] ------------------------------------------------------------------------

You could immediately see your image in the docker-hub.

Screenshot from 2018-04-14 12-37-07


Now anyone can pull this image directly run the test (assuming you have selenium grid up and running & provided the ip)

sudo docker run -e SELENIUM_HUB=10.11.12.13 -e MODULE=search-module.xml -e BROWSER=chrome vinsdocker/containertest:demo

Lets try to automate our test automation build process completely.

Integrating GitHub & Jenkins:

  • First crate an empty repo in GitHub

Screenshot from 2018-04-14 12-52-03

  • Push your maven project for automated tests into this repo. Copy the URL to clone this repo.

Screenshot from 2018-04-14 12-55-09

  • Create a Jenkins job to build an image from this repo & use the above copied URL.

Screenshot from 2018-04-14 09-00-26

  • Ensure that Jenkins can build an image successfully on the slave/node.  Add the dockerhub credentials in the settings,xml on this node. Ensure that you are able to push the image to docker hub directly.

Screenshot from 2018-04-14 09-10-28

  • Go to Manage Jenkins / Configure System to create a webhook for GitHub integration (You must be Jenkins admin to do that). Copy this URL

Screenshot from 2018-04-14 09-20-14


  • Go to GitHub. Go to Settings for the project repo. Add the Webhook url you had copied.

Screenshot from 2018-04-14 09-20-34

That’s it. Now whenever you make a code change and push it to GitHub, it triggers a Jenkins build immediately.  The Jenkins automatically builds and pushes an image to docker-hub.  Once the image is pushed to dockerhub, any machine with docker will able to run your tests!!


Screenshot from 2018-04-14 13-14-06


Summary:

By integrating GitHub/BitBucket, Jenkins/any CI tool and DockerHub/other Registry, we are completely able to automate our test automation build process. This way, you can easily run your automated tests on any machine (assuming docker installed) without worrying about any other dependency.  This is the way to go if you plan for running yours in the cloud. All the test automation infrastructure – selenium grid and nodes to run all your modules are dockerized. So you could start instances in EC2, run the tests and terminate as and when you need!  By doing this, test automation not only saves testing effort and but also the infrastructure maintenance cost.


Happy Testing & Subscribe 🙂


Share This:

JMeter / Selenium WebDriver – How To Trigger Automated Test Execution From Slack

$
0
0

Overview:

We use Slack in our organization. You might also be using Slack for communicating information among the team members in your org. Slack is a great tool and it keeps everyone up to date and reduces unnecessary emails. Particularly automated status, build notifications etc which might flood your inbox. I have already shared an article on posting automated test results in Slack on a specific channel here.

Lets see how we could trigger an automated test suite execution in your Jenkins/CI tool.

Jenkins/CI:

The very first assumption is you have been using some CI tool like Jenkins. I also assume that the tool exposes some kind of API to trigger/schedule a build/job. Here I use Jenkins. You can get the high level idea and implement something similar if you use other tools.

The second assumption is you have a job in Jenkins configured properly which runs just fine when you trigger it manually.

Creating New User:

Lets start with creating a new user in Jenkins for slack to use. Make a note of the API token.

Screenshot from 2018-04-21 12-02-07

The assumption is this slack user has enough access to trigger the job.

Execute the below CURL command to verify if the user is able to invoke the job.

This is the format of the url. Replace the content within [ ] with appropriate information

curl -X POST http://[user:token]@[jenkins-host-with-port]/job/[job-name]/build

In my case, I tried as shown here.

curl -X POST http://slack:c1c54d626f6a11fbc98ed795ec8862bc@10.11.12.13:8080/job/TEST_ATOMATION_GURU_SLACK_JOB_DEMO/build

Slack – Slash Command:

To invoke the above Jenkins job, we would be using Slack’s slash commands. So whenever you type something after a slash – for ex: ‘/weather‘ – Slack will treat it as a command and can respond to the command. So, for that example, Slack can be configured to provide a weather report for your city.

Screenshot from 2018-04-21 12-19-49

  • Go to your Slack configuration to add Slash configuration.
  • I am going to create a smoketest command – so my team can trigger a smoke test from slack to check the health of the application.

Screenshot from 2018-04-21 12-20-25

  • Add the integration setting as shown here. Provide the URL which we need to call to trigger the jenkins job.

Screenshot from 2018-04-21 13-28-33

  • Select the auto complete help

Screenshot from 2018-04-21 13-31-54

  • Once the configuration is done, You can verify immediately in your Slack. Just type ‘/s’ – you could see the ‘smoketest’ command

Screenshot from 2018-04-21 13-38-48

  • Invoke the command – Check if Jenkins is able to trigger the job.

Screenshot from 2018-04-21 12-27-12

  • If the Job requires a parameter, Use the below URL format to invoke the job with Default parameters.
curl -X POST http://[username:token]@[jenkins-host-with-port]/job/[job-name]/buildWithParameters
  • If you need to pass any specific parameter, Simply append the variable and value in the parameter.
curl -X POST http://[username:token]@[jenkins-host-with-port]/job/[job-name]/buildWithParameters?ENVIRONMENT=PROD
  • To get the status/result of the job, job should be configured to post the results back to Slack. You could check an article on that here.

Note:

  • To make the above approach work, Your Jenkins server should be accessible by Slack. Ensure that it is not blocked by the firewall.

Summary:

Slack commands are very useful and come in handy to get information or to trigger something which you might do frequently. By doing this, any non-technical user in the team could make you use of your automated test scripts by directly calling the slash command.

Happy Testing & Subscribe 🙂


Share This:

Selenium WebDriver – EMail Validation With Disposable EMail Addresses

$
0
0

Overview:

Some of our automated tests might require email validation. Your application might send a Welcome email / User registration confirmation with a link to activate the profile / a token to login as part of Multi-factor Authentication…etc.  Your aim could be to check if the email has received or extract some information like auth token from the email message.

Sometimes, applications might expect unique email addresses. In that case, we end up using some random email addresses like random-string@gmail.com. Of-course this is not a valid email address. Your application does not care as long as it is in the expected format & not used already. However, if your application tries to send any email as part of your tests for that random email, How will you verify?

Would it not be legendaryyyyyyyyyyyyyyyy as Barney would say if we could have an API which generates a Valid & Random email address every time through which you could receive emails?

lengendary

Lets see how we could achieve that!

Sample Application:

As usual, to explain things better, I consider this site to send an email. When you enter an email id and click on check, a test email is sent to the given email id immediately. Lets consider this as our application and we need to verify if it sends an email correctly to the given email address!

Screenshot from 2018-04-28 17-06-12

We create a Page Object for the above page as shown here.

public class IsMyEmailWorkingPage {

    private final WebDriver driver;

    @FindBy(id="verify_email")
    private WebElement email;

    @FindBy(id="content_cob_check")
    private WebElement checkBtn;

    public IsMyEmailWorkingPage(final WebDriver driver){
        this.driver = driver;
        PageFactory.initElements(driver, this);
    }

    public void goTo(){
        this.driver.get("http://ismyemailworking.com");
    }

    public void checkEmail(final String emailAddress){
        this.email.sendKeys(emailAddress);
        this.checkBtn.click();
    }

}

Nada – EMail API:

To test our sample website, we want a random working email. So, I am considering this site which uses some API internally.  Nada website creates random working email addresses. No worries. We will not be using the web interface. We would use its API which the web interface uses.

Screenshot from 2018-04-28 17-26-46

Inbox API:

Nada has few email domains (ex: nada.ltd). Using that you could request for any email address!Making a GET request with an email address creates an instant Inbox for the email address.

https://getnada.com/api/v1/inboxes/{email-id}

here {email-id} could be anything. ex:

  • helloworld@nada.ltd
  • thisisjunk1234@nada.ltd

It does not require any password. So, If i am using helloworld@nada.ltd and you are also using it at the same time, you could see my emails. So, do not use for any sensitive information. This is just for testing purposes. msgs field in the below json is the email inbox which indicates inbox is empty.

Screenshot from 2018-04-28 17-42-23

When I enter this email address in the ‘IsMyEmailWorking’ site, I get an email as shown here.

Screenshot from 2018-04-28 17-45-07

Message API:

Inbox API gives all the list of email messages we have received for the email. If we need to get the email content, we need to get the ‘uid’  of the specific email message, then call this API.

https://getnada.com/api/v1/messages/{message-id}

Here {message-id} is the uid you had extracted from the inbox API.

Screenshot from 2018-04-28 17-50-04

EMail Service:

We have seen the APIs. So, Lets create few classes to make the HTTP calls & process the response JSON etc.

My pom file has below dependencies.

<dependency>
    <groupId>com.mashape.unirest</groupId>
    <artifactId>unirest-java</artifactId>
    <version>1.4.9</version>
</dependency>
<dependency>
    <groupId>com.fasterxml.jackson.core</groupId>
    <artifactId>jackson-databind</artifactId>
    <version>2.9.3</version>
</dependency>
<dependency>
    <groupId>apache-lang</groupId>
    <artifactId>commons-lang</artifactId>
    <version>2.1</version>
</dependency>

Inbox EMail:

We need to convert Nada’s inbox API response JSON to an object. So, I create this class.

@JsonIgnoreProperties(ignoreUnknown=true)
public class InboxEmail {

    @JsonProperty("uid")
    private String messageId;

    @JsonProperty("f")
    private String from;

    @JsonProperty("s")
    private String subject;

    public String getMessageId() {
        return messageId;
    }

    public String getFrom() {
        return from;
    }

    public String getSubject() {
        return subject;
    }
}

Message Class:

To Process message API response,

@JsonIgnoreProperties(ignoreUnknown=true)
public class EmailMessage {

    @JsonProperty("html")
    private String html;

    @JsonProperty("text")
    private String text;

    public String getHtml() {
        return html;
    }

    public String getText() {
        return text;
    }
}

NadaEMailService:

public class NadaEMailService {

    private static final String NADA_EMAIL_DOMAIN = "@nada.ltd";
    private static final String INBOX_MESSAGE_KEY_NAME = "msgs";
    private static final String EMAIL_ID_ROUTE_PARAM = "email-id";
    private static final String MESSAGE_ID_ROUTE_PARAM = "message-id";
    private static final String NADA_EMAIL_INBOX_API = "https://getnada.com/api/v1/inboxes/{email-id}";
    private static final String NADA_EMAIL_MESSAGE_API = "https://getnada.com/api/v1/messages/{message-id}";
    private static final ObjectMapper MAPPER = new ObjectMapper();
    private static final int EMAIL_CHARS_LENGTH = 10;

    private String emailId;


    private void generateEmailId(){
        this.emailId = RandomStringUtils.randomAlphanumeric(EMAIL_CHARS_LENGTH).toLowerCase().concat(NADA_EMAIL_DOMAIN);
    }

    //generates a random email for the first time.
    //call reset for a new random email
    public String getEmailId(){
        if(Objects.isNull(this.emailId)){
            this.generateEmailId();
        }
        return this.emailId;
    }

    //to re-generate a new random email id
    public void reset(){
        this.emailId = null;
    }

    public List<InboxEmail> getInbox() {
        String msgs = Unirest.get(NADA_EMAIL_INBOX_API)
                            .routeParam(EMAIL_ID_ROUTE_PARAM, this.getEmailId())
                            .asJson()
                            .getBody()
                            .getObject()
                            .getJSONArray(INBOX_MESSAGE_KEY_NAME)
                            .toString();
        return MAPPER.readValue(msgs, new TypeReference<List<InboxEmail>>() {});
    }

    public EmailMessage getMessageById(final String messageId) {
        String msgs = Unirest.get(NADA_EMAIL_MESSAGE_API)
                                .routeParam(MESSAGE_ID_ROUTE_PARAM, messageId)
                                .asJson()
                                .getBody()
                                .getObject()
                                .toString();
        return MAPPER.readValue(msgs, EmailMessage.class);
    }

    public EmailMessage getMessageWithSubjectStartsWith(final String emailSubject) {
        return  this.getInbox()
                    .stream()
                    .filter(ie -> ie.getSubject().startsWith(emailSubject))
                    .findFirst()
                    .map(InboxEmail::getMessageId)
                    .map(this::getMessageById)
                    .orElseThrow(IllegalArgumentException::new);
    }

}

Our API exposes 5 methods.

  • getEmailId – generates a random email. Once generated for an instance, it is always reusing the same email. If you want a new one, call reset method
  • reset – nullifies the email id. so that we could re-generate new random email id
  • getInbox – list of inbox messages
  • getMessageById – pass the id of the message to get the content
  • getMessageWithSubjectStartsWith – pass the email subject to get the latest message

Sample Test:

public class EmailTest {
    private NadaEMailService nada;
    private WebDriver driver;
    private IsMyEmailWorkingPage page;

    @BeforeTest
    public void setup() {
        nada = new NadaEMailService();
        driver = DriverManager.getDriver();
        page = new IsMyEmailWorkingPage(driver);
    }

    @Test
    public void emailTest() throws IOException, UnirestException {
        page.goTo();
        page.checkEmail(nada.getEmailId());
        String emailContent = nada.getMessageWithSubjectStartsWith("IsMyEmailWorking").getText();
        System.out.println(emailContent);
    }
}

Summary:

Nada API is a great utility for email validation. By using Nada API, you could create N number of random email id as and when it is required & dispose. It would be extremely useful for for your tests which require unique email addresses every run!

Nada is FREE. You could help Nada’s maker by buying him a coffee here.

Happy Testing & Subscribe 🙂


Share This:

Selenium WebDriver – Multi-Factor Authentication – SMS

$
0
0

Overview:

Multi-factor authentication is a security system which requires more than one authentication method to verify the identity. If your ‘application under test’ has that feature, It might be little bit challenging for you to automate the complete end-to-end flow. TestAutomationGuru has already covered EMail Validation in case if your application includes EMail auth method.

We are assuming that our application somehow sends an authentication code to a given phone number. Our aim here is to get the code programmatically & enter in the application, so that our automated tests can proceed with business workflow. Our aim here is not to send SMS or responding to a SMS even though they are possible!

In this article, Lets see how to automate SMS auth flow.

Twillio:

Twillio is a communication platform which allows us to programmatically make/receive phone calls, SMS & MMS etc. Do note that Twillio is not FREE. However, it is dirt cheap!

  • Register yourself in Twillio
  • Twillio provides an ACCOUNT ID and AUTH TOKEN for using their API. Make a note of them.
  • Buy a phone number from them with SMS capability ($1 per month).

Screenshot from 2018-04-29 09-42-21

  • You can also use their REST API to buy a number programmatically. They also provide a sample code in Java, C#, NodeJs, Ruby, CURL, PHP, Python etc. Our aim here is not to buy tons of numbers. So this is just FYI.

Screenshot from 2018-04-29 09-55-32

  • Once you buy a number – it is ready to receive SMS.
  • Use the number in your application as a test phone number for Multi factor authentication flow.

Lets create a simple utility class which fetches the SMS message.

Maven Dependency:

<dependency>
    <groupId>com.twilio.sdk</groupId>
    <artifactId>twilio</artifactId>
    <version>7.20.0</version>
</dependency>

SMSReader:

public class SMSReader {

    private static final String ACCOUNT_SID = "AC236ekln3498r439r3489fj4e0ddj916aad";
    private static final String AUTH_TOKEN = "d2a145jkfdhry3dhdh993iotg5b14f1";
    private static final String TO_PHONE_NUMBER = "+11234567890"; //test number where we receive SMS

    public SMSReader(){
        Twilio.init(ACCOUNT_SID, AUTH_TOKEN);
    }

    public String getMessage(){
        return getMessages()
                    .filter(m -> m.getDirection().compareTo(Message.Direction.INBOUND) == 0)
                    .filter(m -> m.getTo().equals(TO_PHONE_NUMBER))
                    .map(Message::getBody)
                    .findFirst()
                    .orElseThrow(IllegalStateException::new);
    }
    //deletes all the messages
    public void deleteMessages(){
        getMessages()
                .filter(m -> m.getDirection().compareTo(Message.Direction.INBOUND) == 0)
                .filter(m -> m.getTo().equals(TO_PHONE_NUMBER))
                .map(Message::getSid)
                .map(sid -> Message.deleter(ACCOUNT_SID, sid))
                .forEach(MessageDeleter::delete);

    }
    
    private Stream<Message> getMessages(){
        ResourceSet<Message> messages = Message.reader(ACCOUNT_SID).read();
        return StreamSupport.stream(messages.spliterator(), false);
    }

}

Lets assume that our application has a login screen. Based on some business rules, upon user login, it sends out an auth code to the phone number registered. Now we use our SMSReader utility to read the auth code.

Lets create a simple test.

public class SMSTest {

    private WebDriver driver;
    private LoginPage page;
    private SMSReader sms;

    @BeforeTest
    public void setup(){
        driver = DriverManager.getDriver();
        page = new LoginPage(driver);
        sms = new SMSReader();
    }

    @Test
    public void smsTest(){
        //clean all the existing messages if any
        sms.deleteMessages();

        page.login("username", "password");
        //if the page is asking for SMS code
        if(page.isMFArequired()){
            String code = sms.getMessage();
            page.enterCode(code);
        }
    }

}

Free Online SMS Receiver:

In case you do not like to use Twillio, you could take a look at few online SMS receivers like this site. Basically this site has few numbers from which you could pick one and use it as a test phone numbers for your application.

Screenshot from 2018-04-29 19-11-10

Do note some one else could also use that number at the same time & any one can see the message your application sends. Assuming SMS has just code as shown below and no other sensitive information, You could safely use! Others can not just figure it out what these codes are for! For ex: We do not know which test application in the world sent this message!

Screenshot from 2018-04-29 19-18-00

Unfortunately this site does not have any APIs. Lets come up with our own APIs using JSoup.

Maven Dependency:

<dependency>
    <groupId>org.jsoup</groupId>
    <artifactId>jsoup</artifactId>
    <version> 1.11.3</version>
</dependency>

SMSUtil:

public class SMSUtil {

    private static final String SMS_RECEIVE_FREE_URL = "https://smsreceivefree.com/country/usa";
    private static final String SMS_MESSAGE_LIST_URL = "https://smsreceivefree.com/info/";
    private static final String NUMBER_CSS_CLASS = "numbutton";
    private static final String TABLE_CSS_SELECTOR = "table.msgTable > tbody > tr";
    private static final String HREF = "href";
    private static final String HTML_TD = "td";
    private static final String FORWARD_SLASH = "/";
    private static final Pattern PATTERN = Pattern.compile("/info/(\\d+)/");

    public String getNumber() throws IOException {
        return Jsoup.connect(SMS_RECEIVE_FREE_URL)           //access the site
                    .get()
                    .body()                                  //get html body
                    .getElementsByClass(NUMBER_CSS_CLASS)    //get all number elements
                    .stream()
                    .map(e -> e.attr(HREF))                  //get href attr value
                    .map(PATTERN::matcher)                   //regex to find the number in the url
                    .filter(Matcher::find)                   //if there is number
                    .findAny()                               //pick any
                    .map(m -> m.group(1))                    //get the number
                    .orElseThrow(IllegalStateException::new);
    }

    public String getMessage(final String phoneNumber, final String fromPhoneNumber) throws IOException {
        return Jsoup.connect(SMS_MESSAGE_LIST_URL.concat(phoneNumber).concat(FORWARD_SLASH))   //access the site
                    .get()
                    .body()                                                                        //get html body
                    .select(TABLE_CSS_SELECTOR)
                    .stream()
                    .map(tr -> tr.getElementsByTag(HTML_TD))                                       //get all cells
                    .filter(tds -> tds.get(0)
                                            .text()
                                            .trim()
                                            .startsWith(fromPhoneNumber))                          //if the number starts with given number
                    .findFirst()                                                                   //find first match
                    .map(tds -> tds.get(2))                                                        //pick 3rd cell
                    .map(td -> td.text().trim())                                                   //get cell value
                    .orElseThrow(IllegalStateException::new);
    }

}

SMS Test:

public class SMSTest {

    private WebDriver driver;
    private LoginPage page;
    private SMSUtil sms;
    private final String fromPhoneNumber = "1234567"; //this is the number your application uses

    @BeforeTest
    public void setup(){
        driver = DriverManager.getDriver();
        page = new LoginPage(driver);
        sms = new SMSUtil();
    }

    @Test
    public void smsTest(){
        //get a phone number
        String phoneNumber = sms.getNumber();

        //use the number in the application
        page.setNumber(phoneNumber);
        
        //some code which triggers application to send a SMS
        ...
        ...
        //get SMS
        String code = sms.getMessage(phoneNumber, fromPhoneNumber);

        //use the code
        ...
    }

}

Summary:

Automating Multi factor authentication with SMS is not a big challenge by using Twillio / JSoup with online SMS receivers.  Both approaches worked just fine for me. Twillio provides good privacy & flexibility at a reasonable price! So, I would prefer Twillio.

Happy Testing & Subscribe 🙂


Share This:

Selenium WebDriver – Factory Design Pattern Using Java 8 – Supplier

$
0
0

Overview:

We had already covered about Factory Design Pattern in detail here. If you had not read that before, I would suggest you to check that article first. In this article, We are going to follow slightly a different approach using Java8 lambda expressions. Advantage of using lambda expressions is to write only fewer lines of code & not to create multiple classes.

Supplier:

Java from its version 8 supports lambda expressions by using special type of interfaces called Functional Interfaces. If you are new to Java and would like to be good at it, I would suggest you to spend some time here to explore this area very well. It might look like it is a lot of functional interfaces. Actually It is not. There are only very few basic functional interfaces. Some of them are repeating based on the number of arguments it could accept etc / depends on the data types it would return.

The one which we might be interested in for the factory pattern is called Supplier.  Supplier does not accept any arguments. Whenever it is invoked it returns a new/distinct object whenever it is invoked.  If you look at Java’s functional interfaces list, you could see different types of suppliers like IntSupplier, LongSupplier, BooleanSupplier..etc  They are for supporting java’s primitive data types. Lets ignore them for the time being. We are interested in the supplier which returns an object.

Very simple example of Supplier would be as shown here. Basically we would wrap the object inside a Supplier. Here we always return a hard coded data. But you could add your logic to return new Object you want. hopefully you get idea.

Supplier<String> hi = () -> {
    return "Hi";
};

Supplier<String> hello = () -> {
    return "Hello";
};

Now the important part is how to invoke the above supplier. That is simple. Just invoke the method ‘get’ from the supplier.

System.out.println(hi.get());

The above code prints ‘Hi’.

Driver Factory:

If the above example is clear, then understanding below code would be easier for you.  As you see, I return a new Driver instance here whenever supplier is called!

//chrome driver supplier
Supplier<WebDriver> chromeDriverSupplier = () -> {
    System.setProperty("webdriver.chrome.driver", "/path/to/chromedriver");
    return new ChromeDriver();
};

//firefox driver supplier
Supplier<WebDriver> firefoxDriverSupplier = () -> {
    System.setProperty("webdriver.gecko.driver", "/Users/username/Downloads/geckodriver");
    return new FirefoxDriver();
};

You might want to add additional suppliers like Safari, IE etc depends on your requirement.

public enum DriverType {
    CHROME,
    FIREFOX,
    SAFARI,
    IE;
}

To avoid if-else / switch statements, I create a map as shown here. Once I have all my suppliers, then I add the suppliers into the map.

public class DriverFactory {

    private static final Map<DriverType, Supplier<WebDriver>> driverMap = new HashMap<>();

    //chrome driver supplier
    private static final Supplier<WebDriver> chromeDriverSupplier = () -> {
        System.setProperty("webdriver.chrome.driver", "/path/to/chromedriver");
        return new ChromeDriver();
    };

    //firefox driver supplier
    private static final Supplier<WebDriver> firefoxDriverSupplier = () -> {
        System.setProperty("webdriver.gecko.driver", "/Users/username/Downloads/geckodriver");
        return new FirefoxDriver();
    };

    //add more suppliers here

    //add all the drivers into a map
    static{
        driverMap.put(DriverType.CHROME, chromeDriverSupplier);
        driverMap.put(DriverType.FIREFOX, firefoxDriverSupplier);
    }

    //return a new driver from the map
    public static final WebDriver getDriver(DriverType type){
        return driverMap.get(type).get();
    }

}

Now your test should be simply written as shown here to get a new WebDriver.

@Test
public void driverTest(){
    WebDriver driver = DriverFactory.getDriver(DriverType.CHROME);
    driver.get("https://www.google.com");
}

Summary:

The above code looks cleaner and removes ugly if-else/switch statements. Java8 Supplier also helps us from writing too many classes.


Happy Testing & Subscribe 🙂


Share This:


Selenium WebDriver – Scriptless Page Object Design Pattern – Part 1

$
0
0

Overview:

One of the applications I had automated had some unique functionality! The application helped the users to connect with different service providers! Users would be entering their preference in the application. The application would show list of service providers. Users could pick one from them and and fill out a specific form for the service provider to get the better service.

To understand this better, assume an application like Dice.com where you search for list of openings based on your preferences in Dice which is Dice specific application fucntionality. Then when you try to apply for a job from the search results, you might have to provide some additional information in a company specific form which has posted the ad.

Challenges:

I had to automate one application like Dice in which the service providers forms are very complex. To imagine, there are forms in which we have more than 1000 elements! Yes it is Thousand! 100 dropdowns, 200 radio buttons, 300 text boxes etc. All these forms are not created at run time. They are created whenever a new service provider is added into our application. A new form is created for the provider as per the provider’s request. All the elements in the forms would have unique id/names. There would NOT be any relationship among the forms from different providers.  So, no reuse!

Definitely I can not create page object with FindBy for 1000 elements and corresponding methods for filling out the form. I also can not spend too much time on automating the forms. I was looking for some approach which would save me a lot of time.

Sample Application:

As usual, to give you an idea, We are going to consider this form. Real form would be having a lot more elements than this.

Screenshot from 2018-06-17 10-53-40

Here the service provider is a doctor who seeks for patients medical history to give the patient better service. This is the page for which we need to come up with page object for filling out the form.

JSON Page Object Model:

In our scriptless framework approach, we would be creating page object in JSON format. We would be maintaining a separate JSON for each and every form/page. The Page object would be more or less as it is shown here for a page.

{

    "element1-name":"value1",
    "element2-name":"value2",
    "element3-name":"value3",
    ...

}

We would be following the below process for each and every page for which you want the Page object to be in JSON format. To achieve that we would be injecting few scripts in the chrome console.

  • Launch the form manually. [ Fill the form manually with appropriate inputs as it is shown here. It is not really required. We would NOT want our page object to have hard coded data. But we do this exercise now to get an idea to see how it works ]

Screenshot from 2018-06-16 22-49-10


  • Launch chrome console and inject JQuery as it is shown here.
var jq = document.createElement('script');
jq.src = "//code.jquery.com/jquery-3.2.1.min.js";
document.getElementsByTagName('head')[0].appendChild(jq);


Screenshot from 2018-06-17 11-36-33

  • Lets create an alias for JQuery. Run this command in the chrome console.
var $j = jQuery.noConflict();
  • Run this below command in the chrome console which is used to extract the current input.
var eles = {};
var eleMap = {

    'INPUT#checkbox': function(ele){
        eles[ele.name] = eles[ele.name] || [];
        if($j(ele).is(':checked')){
            eles[ele.name].push(ele.value); 
        }
    },

    'INPUT#radio': function(ele){
        if($j(ele).is(':checked')){
            eles[ele.name] = ele.value;
        }
    },    
    
    'INPUT#text': function(ele){
        eles[ele.name] = ele.value;
    },

    'SELECT#': function(ele){
        eles[ele.name] = ele.value;
    }

}
  • Then run the below command in the chrome console which is responsible for creating the page object.
var pageObjectModel = function(root){
    $j(root).find('input, select, textarea').filter(':enabled:visible:not([readonly])').each(function(){
            let eleName = this.name;
            let key = this.tagName + "#" + (this.getAttribute('type') || '');
            var func = eleMap[key] || eleMap['INPUT#text'];
            func(this);
    });
    console.log(JSON.stringify(eles, null, 4));
}
  • Now chrome console is ready to create page object. We need to give the root element under which it has to find all the elements and create a page object. In our case, it is main document. So I run the below command to get the JSON object model.
pageObjectModel(document)

Screenshot from 2018-06-17 11-53-37

  • That’s it. Our Page object for a complex form is ready within few seconds with all the inputs we had entered! You do not have to inject these scripts one by one. You could inject all of them at once.
  • Copy the JSON output from the console and save it in a file. You could remove any fields from the JSON file which you do not want to include in automation.
{
  "q71_patientGender":"Male",
  "q45_patientName[first]":"test",
  "q45_patientName[last]":"automation",
  "q46_patientBirth[month]":"January",
  "q46_patientBirth[day]":"6",
  "q46_patientBirth[year]":"1960",
  "q72_patientHeight72":"178",
  "q73_patientWeight73":"72",
  "q74_patientEmail":"test@gmail.com",
  "q50_reasonFor50":"general check up",
  "q51_pleaseList":"none",
  "q52_haveYou52[]":[
    "Anemia",
    "Asthma",
    "Arthritis",
    "Diabetes",
    "Emotional Disorder"
  ],
  "q55_otherIllnesses":"none",
  "q69_pleaseList69":"none",
  "q68_pleaseList68":"none",
  "q80_exercise":"1-2 days",
  "q81_eatingFollowing":"I have a loose diet",
  "q76_alcoholConsumption":"I don't drink",
  "q77_caffeineConsumption77":"1-2 cups/day",
  "q78_doYou":"No",
  "q17_includeOther":"none"
}


Application Independence:

The above approach is NOT application dependent. I can use the same approach for a completely different application. I still get the Page Object in the console as shown here. So you should be able to use for your application as well.

Screenshot from 2018-06-17 12-06-14


Summary:

As you see, by injecting few scripts, we extract all the fields on a page or under specific element, we create a map of field names and values. This approach would be very useful in creating a page object for very complex page which contains hundreds of elements.

If you are still wondering – What am I supposed to do with this JSON? – No worries. I would explain that in the next article. Please continue reading.


Happy Testing & Subscribe 🙂


Share This:

Selenium WebDriver – Scriptless Page Object Design Pattern – Part 2

$
0
0

Overview:

This article is continuation of Part 1 which you can read here.

In Part 1, We created JSON based page objects. Now lets see how to use them in our automation scripts.

Page Object Parser:

We need some script…..by this time, you might be like, Hold on! Script? Did you not say that Scriptless!!? Well.. Do not get upset! Please continue reading…! It will all make sense.

Yes.. we need some script which is going to be just one time creation which is responsible for parsing the JSON file and interacting with the page accordingly.

  • I would be launching the website using Chrome as it is shown here. More Info on the below DriverFactory is here.
WebDriver driver = DriverFactory.getDriver(DriverType.CHROME);
driver.get("https://form.jotform.com/81665408084158");
  • To parse the JSON file, I would be using Jackson library.
//you need this to use below ObjectMapper
import com.fasterxml.jackson.databind.ObjectMapper;

//To parse JSON and convert to a map
String path = "/path/to/page-objects.json";
Map<String, Object> result = new ObjectMapper().readValue(new File(path), LinkedHashMap.class);

//Iterate all the keys from the map & enter data
result.entrySet()
        .stream()
        .forEach(entry -> {
            //find all the elements for the given name / map key
            List<WebElement> elements = driver.findElements(By.name(entry.getKey()));

            //scroll into view - remove this if you do not need it
            ((JavascriptExecutor) driver).executeScript("arguments[0].scrollIntoView(true);", elements.get(0));

            //element is found already, scrolled into view
            //now it is time for entering the value
            ElementsHandler.handle(elements, entry.getValue());
        });

The above script delegates all the data entering part to the below script.

Elements Handler:

The below script is basically handles different types of element inputs.

public class ElementsHandler {

    private static final Map<String, BiConsumer<List<WebElement>, Object>> map = new HashMap<>();

    //entering text box
    //we want only first element
    public static final BiConsumer<List<WebElement>, Object> TEXT_HANDLER = (elements, value) -> {
        elements.get(0).sendKeys(value.toString());
    };

    //radio button selection
    //iterate all the elements - click if the value matches
    public static final BiConsumer<List<WebElement>, Object> RADIO_HANDLER = (elements, value) -> {
        elements.stream()
                .filter(ele -> ele.getAttribute("value").equals(value))
                .forEach(WebElement::click);
    };

    //checkbox selection
    //iterate all the elements - click all the elements if the value is present in the list
    public static final BiConsumer<List<WebElement>, Object> CHECKBOX_HANDLER = (elements, value) -> {
        List<String> list = (List<String>) value;
        elements.stream()
                .filter(ele -> list.contains(ele.getAttribute("value")))
                .forEach(WebElement::click);
    };

    //dropdown selection
    //convert webelement to select
    private static final BiConsumer<List<WebElement>, Object> SELECT_HANDLER = (element, value) -> {
        Select select = new Select(element.get(0));
        select.selectByValue(value.toString());
    };

    //store all the above all elements handlers into a map
    static{
        map.put("input#text", TEXT_HANDLER);
        map.put("input#radio", RADIO_HANDLER);
        map.put("input#checkbox", CHECKBOX_HANDLER);
        map.put("select#select-one", SELECT_HANDLER);
        map.put("textarea#textarea", TEXT_HANDLER);
    }

    //handle element
    public static void handle(List<WebElement> elements, Object value){
        String key = elements.get(0).getTagName() + "#" + elements.get(0).getAttribute("type");
        map.getOrDefault(key, TEXT_HANDLER).accept(elements, value);
    }


}

Now we have everything ready to run the script. [The data was entered by the above script. Once it is done, I manually scrolled up to show the entered data]


Now you could keep on feeding the JSON files to the parser which knows how to enter data on the given page.

Questions?

I am sure you might have some questions in the approach.

  • Will this approach work for any type of application?
    • Well…It depends. Every framework will have its own pros and cons. Our traditional page object is difficult to maintain/create for pages which have hundreds of elements. So, in those cases, this approach would work great. Usually I would try combination of all. Would not suggest a single approach for any type of application.
  • Can I use it for my application?
    • Why not? You should be able to copy the scripts and try to use it for your application as well. However, Do remember that it is not a library which handles all types of applications/controls like Date input /slider etc.
  • Will this approach would enter always hard coded data? What about dynamic data? 
    • We can enhance this approach to a next level to enter dynamic data from CSV file/map etc. I have explained in the next article which is here.
  • This approach enters only data. What about other page validation?
    • Again, It can be done by modifying the Javascript we injected in the chrome console to create page object slightly in a different format to include page validation as well. I will leave that to you.

Summary:

We created a JSON based page object model by injecting Javascript on the chrome console. Then by feeding it to the JSON parser, we are able to interact with the application in no time. As I had mentioned, It is NOT a library for any type of applications. I had demoed a simple working example for you to understand and learn some concepts. Please use this and modify it as per your project needs.

Happy Testing & Subscribe 🙂


Share This:

Selenium WebDriver – Scriptless Page Object Design Pattern – Part 3

$
0
0

Overview:

We had already covered 2 articles on the script-less page object design.  If you have not read them already, I would suggest you to read them first in the below order.

In the Part 1, when we created the JSON file, we had hard-coded the test data. Now in this part, we are going to make this data-driven by referring to a CSV sheet for test data.

Sample CSV Data:

Lets assume I have test data as shown here. I would like to access the page and enter the data on the page for each row of the CSV file to make this data-driven.

Screenshot from 2018-06-21 15-50-31

Lets also assume that first row in the CSV is the column header.

Page Object JSON:

In order to do that, We should NOT want our JSON Page Object to be created in the below format as it hard codes the data.

{
  "q71_patientGender":"Male",
  "q45_patientName[first]":"test",
  "q45_patientName[last]":"automation",
  "q46_patientBirth[month]":"January",
  "q46_patientBirth[day]":"6",
  "q46_patientBirth[year]":"1960"
  ...
}

Instead, we need to refer to the column name of the CSV as shown here.

{
  "q71_patientGender":"${gender}",
  "q45_patientName[first]":"${firstname}",
  "q45_patientName[last]":"${lastname}",
  "q46_patientBirth[month]":"${dob-month}",
  "q46_patientBirth[day]":"${dob-day}",
  "q46_patientBirth[year]":"${dob-year}"
  ...
 }

You could directly update the JSON yourself with the appropriate column name or you could inject below script in the Chrome console.

//inject JQuery
var jq = document.createElement('script');
jq.src = "//code.jquery.com/jquery-3.2.1.min.js";
document.getElementsByTagName('head')[0].appendChild(jq);

//create alias
var $j = jQuery.noConflict();

//inject function for page object model
var eles = {};
var pageObjectModel = function(root){
    $j(root).find('input, select, textarea').filter(':enabled:visible:not([readonly])').each(function(){
        let eleName = this.name;
        eles[eleName] = "${" + eleName + '}';
    });
    console.log(JSON.stringify(eles, null, 4));
}

//invoke the function
pageObjectModel(document)

It would create the Page Object JSON in the below format assuming your CSV file has those columns.

Screenshot from 2018-06-21 16-07-50

Note: If you do not want to refer to CSV for all the fields, you can use the ${…} expression only for those elements which need to be retrieved from the CSV file

For example, below JSON is perfectly valid. In this case, we want only the Gender to be retrieved from the CSV. All other fields would use the hard coded data.


{
  "q71_patientGender":"${gender}",
  "q45_patientName[first]":"test",
  "q45_patientName[last]":"automation",
  "q46_patientBirth[month]":"January",
  "q46_patientBirth[day]":"6",
  "q46_patientBirth[year]":"1960"
  ...
}

Page Object Parser:

We already have seen this in Part 2 of this article. We have Page Object Parser as shown here which reads the Page Object json file and gives the map of the element names and value to be entered.

import com.fasterxml.jackson.databind.ObjectMapper;

import java.io.File;
import java.io.IOException;
import java.util.LinkedHashMap;
import java.util.Map;

public class PageObjectParser {

    public static Map<String, String> parse(String filename) {
        Map<String, String> result = null;
        try {
            result = new ObjectMapper().readValue(new File(filename), LinkedHashMap.class);
        } catch (IOException e) {
            e.printStackTrace();
        }
        return result;
    }

}

CSV Reader:

We need to read the given CSV file and get all the records. So I create below script using apache-commons csv lib.

import org.apache.commons.csv.CSVFormat;
import org.apache.commons.csv.CSVRecord;

import java.io.*;
import java.util.stream.Stream;
import java.util.stream.StreamSupport;

public class CSVReader {

    public static Stream<CSVRecord> getRecords(final String filename) throws IOException {
        Reader in = new InputStreamReader(new FileInputStream(new File(filename)));
        Iterable<CSVRecord> records = CSVFormat.RFC4180.withFirstRecordAsHeader().parse(in);
        Stream<CSVRecord> stream = StreamSupport.stream(records.spliterator(), false);
        return stream;
    }

}

Data Map:

Our Page Object parse gives a map as shown here.

[
  "q71_patientGender"="${gender}",
  "q45_patientName[first]"="${firstname}",
  "q45_patientName[last]"="${lastname}",
]

Our CSV Reader can give us a map for each row as shown here.

[
    "gender"="Male",
    "firstname"="Michael",
    "lastname"="jackson"
]

But what we really need is a map as shown here

[
  "q71_patientGender"="Male",
  "q45_patientName[first]"="Michael",
  "q45_patientName[last]"="Jackson",
]

So, I am creating below class which is responsible for replacing the ${csvcolmn} in the JSON Page Object with the actual data.

public class DataMap {

    private static final String TEMPLATE_EXPRESSION = "\\$\\{([^}]+)\\}";
    private static final Pattern TEMPLATE_EXPRESSION_PATTERN = Pattern.compile(TEMPLATE_EXPRESSION);

    //json element names and values with ${..}
    final Map<String, String> elementsNameValueMap;
    
    //csv test data for a row
    final Map<String, String> csvRecord;

    public DataMap(Map<String, String> elementsNameValueMap, Map<String, String> csvRecord){
        this.elementsNameValueMap = elementsNameValueMap;
        this.csvRecord = csvRecord;
        
        //this replaces ${..} with corresponding value from the CSV
        this.updateMapWithValues(elementsNameValueMap);
    }

    //this map contains elements names and actual values to be entered
    public Map<String, String> getElementsNameValueMap(){
        return this.elementsNameValueMap;
    }

    private void updateMapWithValues(final Map<String, String> variablesMapping){
        variablesMapping
                .entrySet()
                .stream()
                .forEach(e -> e.setValue(updateTemplateWithValues(e.getValue())));
    }

    private String updateTemplateWithValues(String templateString){
        Matcher matcher = TEMPLATE_EXPRESSION_PATTERN.matcher(templateString);
        while(matcher.find()){
            templateString = this.csvRecord.get(matcher.group(1));
        }
        return templateString;
    }

}

Now you could call CSVreader to get the list of csv records

//get csv data
Stream<CSVRecord> records = CSVReader.getRecords(TEST_DATA_CSV_PATH);

//csv records
records
        .map(CSVRecord::toMap)  //convert each row to a map of key value pair - contains column name and row value
        .map(csvMap -> new DataMap(PageObjectParser.parse(PAGE_OBJECT_JSON_PATH), csvMap)) //feed page object map and csv row map to get the page object element name and actual value
        .map(DataMap::getElementsNameValueMap) // get the map which contains elements name and actual test data from csv
        .forEach(ScriptlessFramework::accessPageEnterData); //this method is responsible for accessing the page and calling elements handler

Below is the method which is responsible for accessing the page and entering the data for each Map it receives.

private static void accessPageEnterData(Map<String, String> map){

    //start webdriver
    WebDriver driver = DriverFactory.getDriver(CHROME);
    driver.get("https://form.jotform.com/81665408084158");

    //enter data
    map.entrySet()
            .stream()
            .forEach(entry -> {
                List<WebElement> elements = driver.findElements(By.name(entry.getKey()));
                ((JavascriptExecutor) driver).executeScript("arguments[0].scrollIntoView(true);", elements.get(0));
                ElementsHandler.handle(elements, entry.getValue());
            });


    //quit
    driver.quit();
    
}

I tried to run with 2 records in a CSV file which works just as we expected.


GitHub:

I have uploaded the project here for your reference.

Summary:

By injecting JQuery on the chrome console, We are able to quickly create page objects within few seconds. We modified only those field names in the JSON for which we would be referring the data from the CSV file. Now the ScriptlessFramework engine parses the given CSV file and Page object json ans enters the data for each row of the CSV file. You could further enhance this approach to create a workflow / include page validation etc.


Happy Testing & Subscribe 🙂


Share This:

Selenium WebDriver – How To Test REST API

$
0
0

Overview:

I have come across this question many times from people that how to test rest api using selenium webdriver. You could see many related questions in StackOverflow.com. People who are new to test automation sometimes do not understand the limitation of selenium and try to do API testing using selenium / find it difficult to include REST API testing in their framework. In this article, lets see how to include REST API related testing in your existing selenium framework.

Problems With UI Testing:

  • Usually UI is slow (This is because – Your browser first sends a request to a server for some information. As soon as it gets the required data, it might take some time processing the data and display them in a table / appropriate format by downloading images and applying the styles etc. So you have to wait for all these process to complete before interacting with the application)
  • As it is slow, it is time consuming
  • Same set of tests might have to be repeated for a different browser testing
  • Browsers are separate process from your selenium scripts. So synchronization is always an issue.
  • UI tests have a lot of dependencies like browsers / versions / grid / drivers etc

So, It does not mean that we should always do API level testing and release the product. We should try to do the API level testing as much as possible. We could have very minimal coverage for UI testing.

REST API Testing:

REST API testing is not very difficult compared to selenium web driver UI testing. Most of the APIs should be one of GET / POST / PUT / PATCH / DELETE  requests.

  • GET is used to get information from the back end to show in the UI
  • POST is used to add new information into the back end.
  • PUT is used to update / replace any existing information.
    • PATCH is for partial update
  • DELETE is used to delete the information from the back end.

If your aim is to do exhaustive testing on your REST APIs, I would suggest you to take a look at JMeter. You could check below articles on REST API testing using JMeter.

Assuming you use a framework like testNG/Junit and do application UI testing using Selenium – now would like to include APIs as well in the same framework – may be for quick data setup or assertion etc, lets see how it can be done in this article.

Dependencies:

I have added below maven dependencies.

<dependency>
    <groupId>com.mashape.unirest</groupId>
    <artifactId>unirest-java</artifactId>
    <version>1.4.9</version>
</dependency>
<dependency>
    <groupId>org.jtwig</groupId>
    <artifactId>jtwig-core</artifactId>
    <version>5.87.0.RELEASE</version>
</dependency>
  • Unirest is a simple lightweight – fluent style HTTP request library
  • JTwig is a very simple template engine

Sample Application:

I am going to consider this application for our testing. It has rest api to list the available contacts, to add / edit / delete contacts. It has also a nice UI built using Angular. You could clone and get that setup up and running in your local to place with that.

As soon as the above application launches, it makes the API GET request to get the list of contacts to display the data in the application.

Getting Contacts:

When you access the home page of the application, it lists all the contacts available.

restool_screenshot

If you monitor the network calls in the chrome-network, you could see some API GET request sent to fetch the list of contacts.

  • If you are not sure where to check, press F12 when you are on the page in Chrome. Chrome DevTools will appear.
  • Check Headers section for the api url

Screenshot from 2018-06-29 22-44-40


https://localhost:4200/api/contacts?q=

You could see some JSON response in the below format.

[
   {
      "id":"123",
      "name":"Guru",
      "email":"guru@gmail.com",
      "thumbnail":"guru.jpg",
      "phone":{
         "mobile":111,
         "work":222
      },
      "friends":[],
      "numbers":[]
   }
]

You could play with the application by adding a contact, modifying a contact, deleting a contact etc and monitor the network calls to get some idea. You could see above said GET / POST / PUT / DELETE requests.

GET Request:

As soon as the application launches, it makes the API GET request to get the list of contacts to display the data in the application.

You could make the above GET request yourself using Unirest as shown here.

String searchQueryApi = "https://localhost:4200/api/contacts?q=";

JsonNode body = Unirest.get(searchQueryApi)
                        .asJson()
                        .getBody();
System.out.println(body);         // gives the full json response
System.out.println(body.length);  // gives the no of items

This could be used to make simple assertions in the test framework. For example, below sample code confirms that all the data in the API response are displayed in the UI.

driver.get("http://localhost:4200");
List<WebElements> contacts = driver.findElements(By.tagName("tr"));

assert.equals(contacts.size(), body.length);

POST Request:

Whenever we try to add a new contact, a request JSON in the below format is sent!

{
  "name": "guru",
  "email": "guru@gmail.com",
  "thumbnail": "",
  "phone": {
    "work": "",
    "mobile": ""
  },
  "numbers": "[]",
  "friends": "[]"
}

If your aim is to send the request yourself, then you might not want to hard code any value here in the JSON file. This is where we would use the JTwig template engine.

First, I create below template.

{
  "name": "{{name}}",
  "email": "{{email}}",
  "thumbnail": "",
  "phone": {
    "work": "",
    "mobile": ""
  },
  "numbers": "[]",
  "friends": "[]"
}

I save the above JSON in a file called ‘contact.json‘. Now I could read the template and replace the values at run time as shown here.

JtwigTemplate template = JtwigTemplate.classpathTemplate("contact.json");
JtwigModel model = JtwigModel.newModel()
                            .with("name", "guru")
                            .with("email", "guru@gmail.com");

template.render(model); //gives the json in the above format by replacing the template expressions

Now we could use Unirest to send the above JSON to create new contact in the application.

String postApi = "https://localhost:4200/api/contacts";

Unirest.post(postApi)
        .header("accept", "application/json")
        .header("Content-Type", "application/json")
        .body(template.render(model))
        .asJson();

Using this approach you could add contacts quickly in the application.

Lets assume, the page could show max only 50 contacts. You need to click on the pagination links to see more contacts. But in your local / QA environment, when you start a fresh application, you might not have enough contacts to test functionality.

If your page object exposes a method to add a contact, you need to call more than 50 times. Adding contact via UI could be very time consuming. Due to synchronization issue, it could fail any moment. You need to handle the situation also – like in case of failure re-try or exit by marking the test failed etc.

With APIs, you could easily modify your page object as shown here. Now you could use this for data set up etc. It should be much faster than the UI approach and less error prone.

class ContactsPage{
    
    //all find bys

    //methods for interacting with web elements

    public void addContacts(int numberOfContacts){

        String postApi = "https://localhost:4200/api/contacts";

        for(int i = 0; i<numberOfContacts; i++){
            Unirest.post(postApi)
                    .header("accept", "application/json")
                    .header("Content-Type", "application/json")
                    .body(template.render(model)) 
                    .asJson();
        }

    }

}

Unirest can be easily used inside your page object as well as shown in the above example.

Edit Request:

To edit a contact, we need to send a PUT request as shown here.

String editApi = "https://localhost:4200/api/contacts/{contact_id}";

JtwigModel model = JtwigModel.newModel()
                            .with("name", "guru")
                            .with("email", "guru123@gmail.com");

Unirest.put(editApi)
        .routeParam("contact_id", "125432")
        .header("accept", "application/json")
        .header("Content-Type", "application/json")
        .body(template.render(model))
        .asJson();

It edits the contacts email id.

Delete Request:

This is even more simpler as shown here.

String editApi = "https://localhost:4200/api/contacts/{contact_id}";

Unirest.delete(editApi)
        .routeParam("contact_id", "1530237572905")
        .asJson();

We could make use of this API to clean all the test data we had inserted as part of our test.

ContactsPageTest{
    
    String editApi = "https://localhost:4200/api/contacts/{contact_id}";

    @Test
    public void someUItest1(){
        //
    }

    @Test
    public void someUItest2(){
        //
    }


    @AfterTest
    public void teardown(){
        for(String contactid: listOfContacts){
            Unirest.delete(editApi)
            .routeParam("contact_id", contactid)
            .asJson();
        }
    }

}

Summary:

By using Unirest in your existing test framework / page objects, you could interact with the application REST APIs and you could also make use of those APIs for a quick data setup in your application for a quick functionality validation.

As you had seen the examples above, whenever possible, try to make use of the application APIs for your testing. I would suggest you to take a look at these approaches as well for exhaustive coverage for your APIs testing.

Happy Testing & Subscribe 🙂


Share This:

Puppeteer – Getting Started

$
0
0

Overview:

We all like chrome browser. Whether you like it not, It is the mostly used browser supported by the tech giant Google. I am huge fan of Chrome DevTools which helps me to play with locators, changing element style etc very quickly. Chrome supported headless mode testing from its version 59. Headless mode would be very useful in some cases – particularly in linux/server environments for automated testing.

Puppeteer is a node library with a high-level API to control chrome headless. It uses the DevTools api to interact with chrome. Aim of this article is to introduce puppeteer to you in case you are not aware already!

Installation:

  • You need to have node installed. Check here for more info.
  • Once installed and everything configured correctly,  you should be able to see node version. It should be above 8.
node -v
v8.11.2
  • Ensure the npm version also. It should be above 5.  You do not have to install it separately as it is bundled with NodeJS. But it can be upgraded.
npm -v
5.6.0
  • Lets create an empty directory for playing with puppeteer.
npm init -y
Wrote to testautomationguru@remotehost/package.json:
{
  "name": "node-playground",
  "version": "1.0.0",
  "description": "",
  "main": "index.js",
  "scripts": {
    "test": "echo \"Error: no test specified\" && exit 1"
  },
  "keywords": [],
  "author": "",
  "license": "ISC"
}
  • Lets install puppeteer now.
npm install --save puppeteer

Launching Browser Instance:

  • Create a test.js file in the directory. At this moment, I am not using js test frameworks like mocha/jest.  Our aim here is to just play with puppeteer.
  • I add the below code in the test.js
const puppeteer = require('puppeteer');

let config = {
    launchOptions: {
        headless: false
    }
}

puppeteer.launch(config.launchOptions).then(async browser => {
  const page = await browser.newPage();
  await page.goto('https://www.google.com');
  await browser.close();    
});
  • Edit the package.json file as shown here. [You could simply run the above script ‘node test.js’. But we might add other test frameworks/more commandline options etc. So it is good to invoke via package.json]
"scripts": {
    "test": "node test.js"
  }
  • Run the below command. You could see it launching chrome with Google.com and closes it immediately.
npm run test
> node-playground@1.0.0 test testautomationguru/node-playground
> node test.js

Devices Emulation/View Port:

  • Add the below statement in test.js, run and check the console. puppeteer comes with configurations for different devices.
const devices = require('puppeteer/DeviceDescriptors');
console.log(devices)
  • Lets see how to emulate iphone. Update test.js as shown here and run the script.
const puppeteer = require('puppeteer');
const devices = require('puppeteer/DeviceDescriptors');
const iPhone = devices['iPhone 6'];

const config = {
    launchOptions: {
        headless: false
    }
}

puppeteer.launch(config.launchOptions).then(async browser => {
  const page = await browser.newPage();
  await page.emulate(iPhone)
  await page.goto('https://www.google.com');
  await browser.close();    
});
  • If we need to control the view port, then we could try something like this.
const config = {
    launchOptions: {
        headless: false
    },
    viewport:{width:1920, height:1080}
}

puppeteer.launch(config.launchOptions).then(async browser => {
  const page = await browser.newPage();
  await page.setViewport(config.viewport)
  await page.goto('https://www.google.com');
  await browser.close();    
});

Interacting With Elements:

  • In the above examples, page appears and browser gets closed very quickly before all the elements appear on the page. To wait for an element to appear, try something as shown here. Selector is css selector for the element you would be interested in.
page.waitFor(selector)
  • Typing text into textbox/textarea
page.type(selector, text)
  • Click on a link/button/image/checkbox/radio button etc
page.click(selector)
  • Selecting a dropdown value
page.select(selector, value)
  • In all the above examples, we assume the selector returns only one element. if the selector returns multiple elements, only the first element would be used. Lets see how to interact with multiple elements.
page.$$eval('input[type="checkbox"]', checkboxes => {
   checkboxes.forEach(chbox => chbox.click())
});
  • To extract value/text from an element
let txt = await page.$eval('span.form-checkbox-item', el => el.innerText );
console.log(txt);
  • Note the difference here $eval vs $$eval
    • $eval returns the first element with the selector expression
    • $$eval returns an array of elements matching the selector
  • In the below example, Lets see how to wait for an element to appear, enter some text and then submit the page.
const puppeteer = require('puppeteer');

const config = {
    launchOptions: {
        headless: false
    },
    viewport:{width:1920, height:1080}
}

//locators
const registrationPage = {
    firstname: 'input[name="firstName"]',
    lastname: 'input[name="lastName"]',
    username: 'input[name="email"]',
    password:  'input[name="password"]',
    confirmPassword:  'input[name="confirmPassword"]',
    submit: 'input[name="register"]'
}

const registrationConfirmation = {
    sigin: 'a[href="mercurysignon.php"]'
}

puppeteer.launch(config.launchOptions).then(async browser => {
  const page = await browser.newPage();
  await page.setViewport(config.viewport)
  
  //mercury tours registration page
  await page.goto('http://newtours.demoaut.com/mercuryregister.php');

  //wait for the firstname to appear
  await page.waitFor(registrationPage.firstname);

  //enter the details
  await page.type(registrationPage.firstname, 'automation');
  await page.type(registrationPage.lastname, 'guru');
  await page.type(registrationPage.username, 'guru');
  await page.type(registrationPage.password, 'guru');
  await page.type(registrationPage.confirmPassword, 'guru');
  await page.click(registrationPage.submit);

  //after page submission check for the sign-in confirmation
  await page.waitFor(registrationConfirmation.sigin);
  await page.click(registrationConfirmation.sigin);

  await browser.close();    
});

Screenshots:

  • Taking screenshot & saving in the current directory.  Only the current view port is stored.
page.screenshot({ path:'test.png'})
  • To take screenshot for full scorllable page.
page.screenshot({ path:'test.png', fullPage: true})
  • To take screenshot of an specific element.  For this we need to pass the x, y, width, height properties.
const pos = await page.evaluate(selector => {
    const element = document.querySelector(selector);
    const {x, y, width, height} = element.getBoundingClientRect();
    return {x, y, width, height};
}, 'input#username');


await page.screenshot({ path:'test.png', clip: pos})
  • Save page as pdf. same like screenshot. But only works if the headless mode is true.
page.pdf({ path:'test.pdf'});

Summary:

Hope you got some idea from this article. As I had mentioned, aim of this article is just to get started with puppeteer. By using puppeteer in headless mode, we can run the tests in server environments without any GUI / docker containers etc. By making use of the Chrome DevTools, we should be able to achieve things like getting HTTP response code, downloading dynamically generated files etc which is not possible in selenium directly. We can take a look at those areas in the upcoming articles.

Happy Testing & Subscribe 🙂


Share This:

Viewing all 69 articles
Browse latest View live